Use ERC-20 tokens
Table of contents
- Previous steps: Start your environment
- Use the built in sample token factory
- Use the Sandbox (optional)
- Create a pool
- Mint tokens
- Transfer tokens
- Sending data with a transfer
- Burn tokens
- Token approvals
- Use Metamask
Previous steps: Start your environment
If you haven’t started a FireFly stack already, please go to the Getting Started guide on how to Start your environment. This will set up a token connector that works with both ERC-20 and ERC-721 by default.
Use the built in sample token factory
If you are using the default ERC-20 / ERC-721 token connector, when the FireFly CLI set up your FireFly stack, it also deployed a token factory contract. When you create a token pool through FireFly’s token APIs, the token factory contract will automatically deploy an ERC-20 or ERC-721 contract, based on the pool type in the API request.
Use the Sandbox (optional)
At this point you could open the Sandbox at http://127.0.0.1:5109/home?action=tokens.pools and perform the functions outlined in the rest of this guide. Or you can keep reading to learn how to build HTTP requests to work with tokens in FireFly.
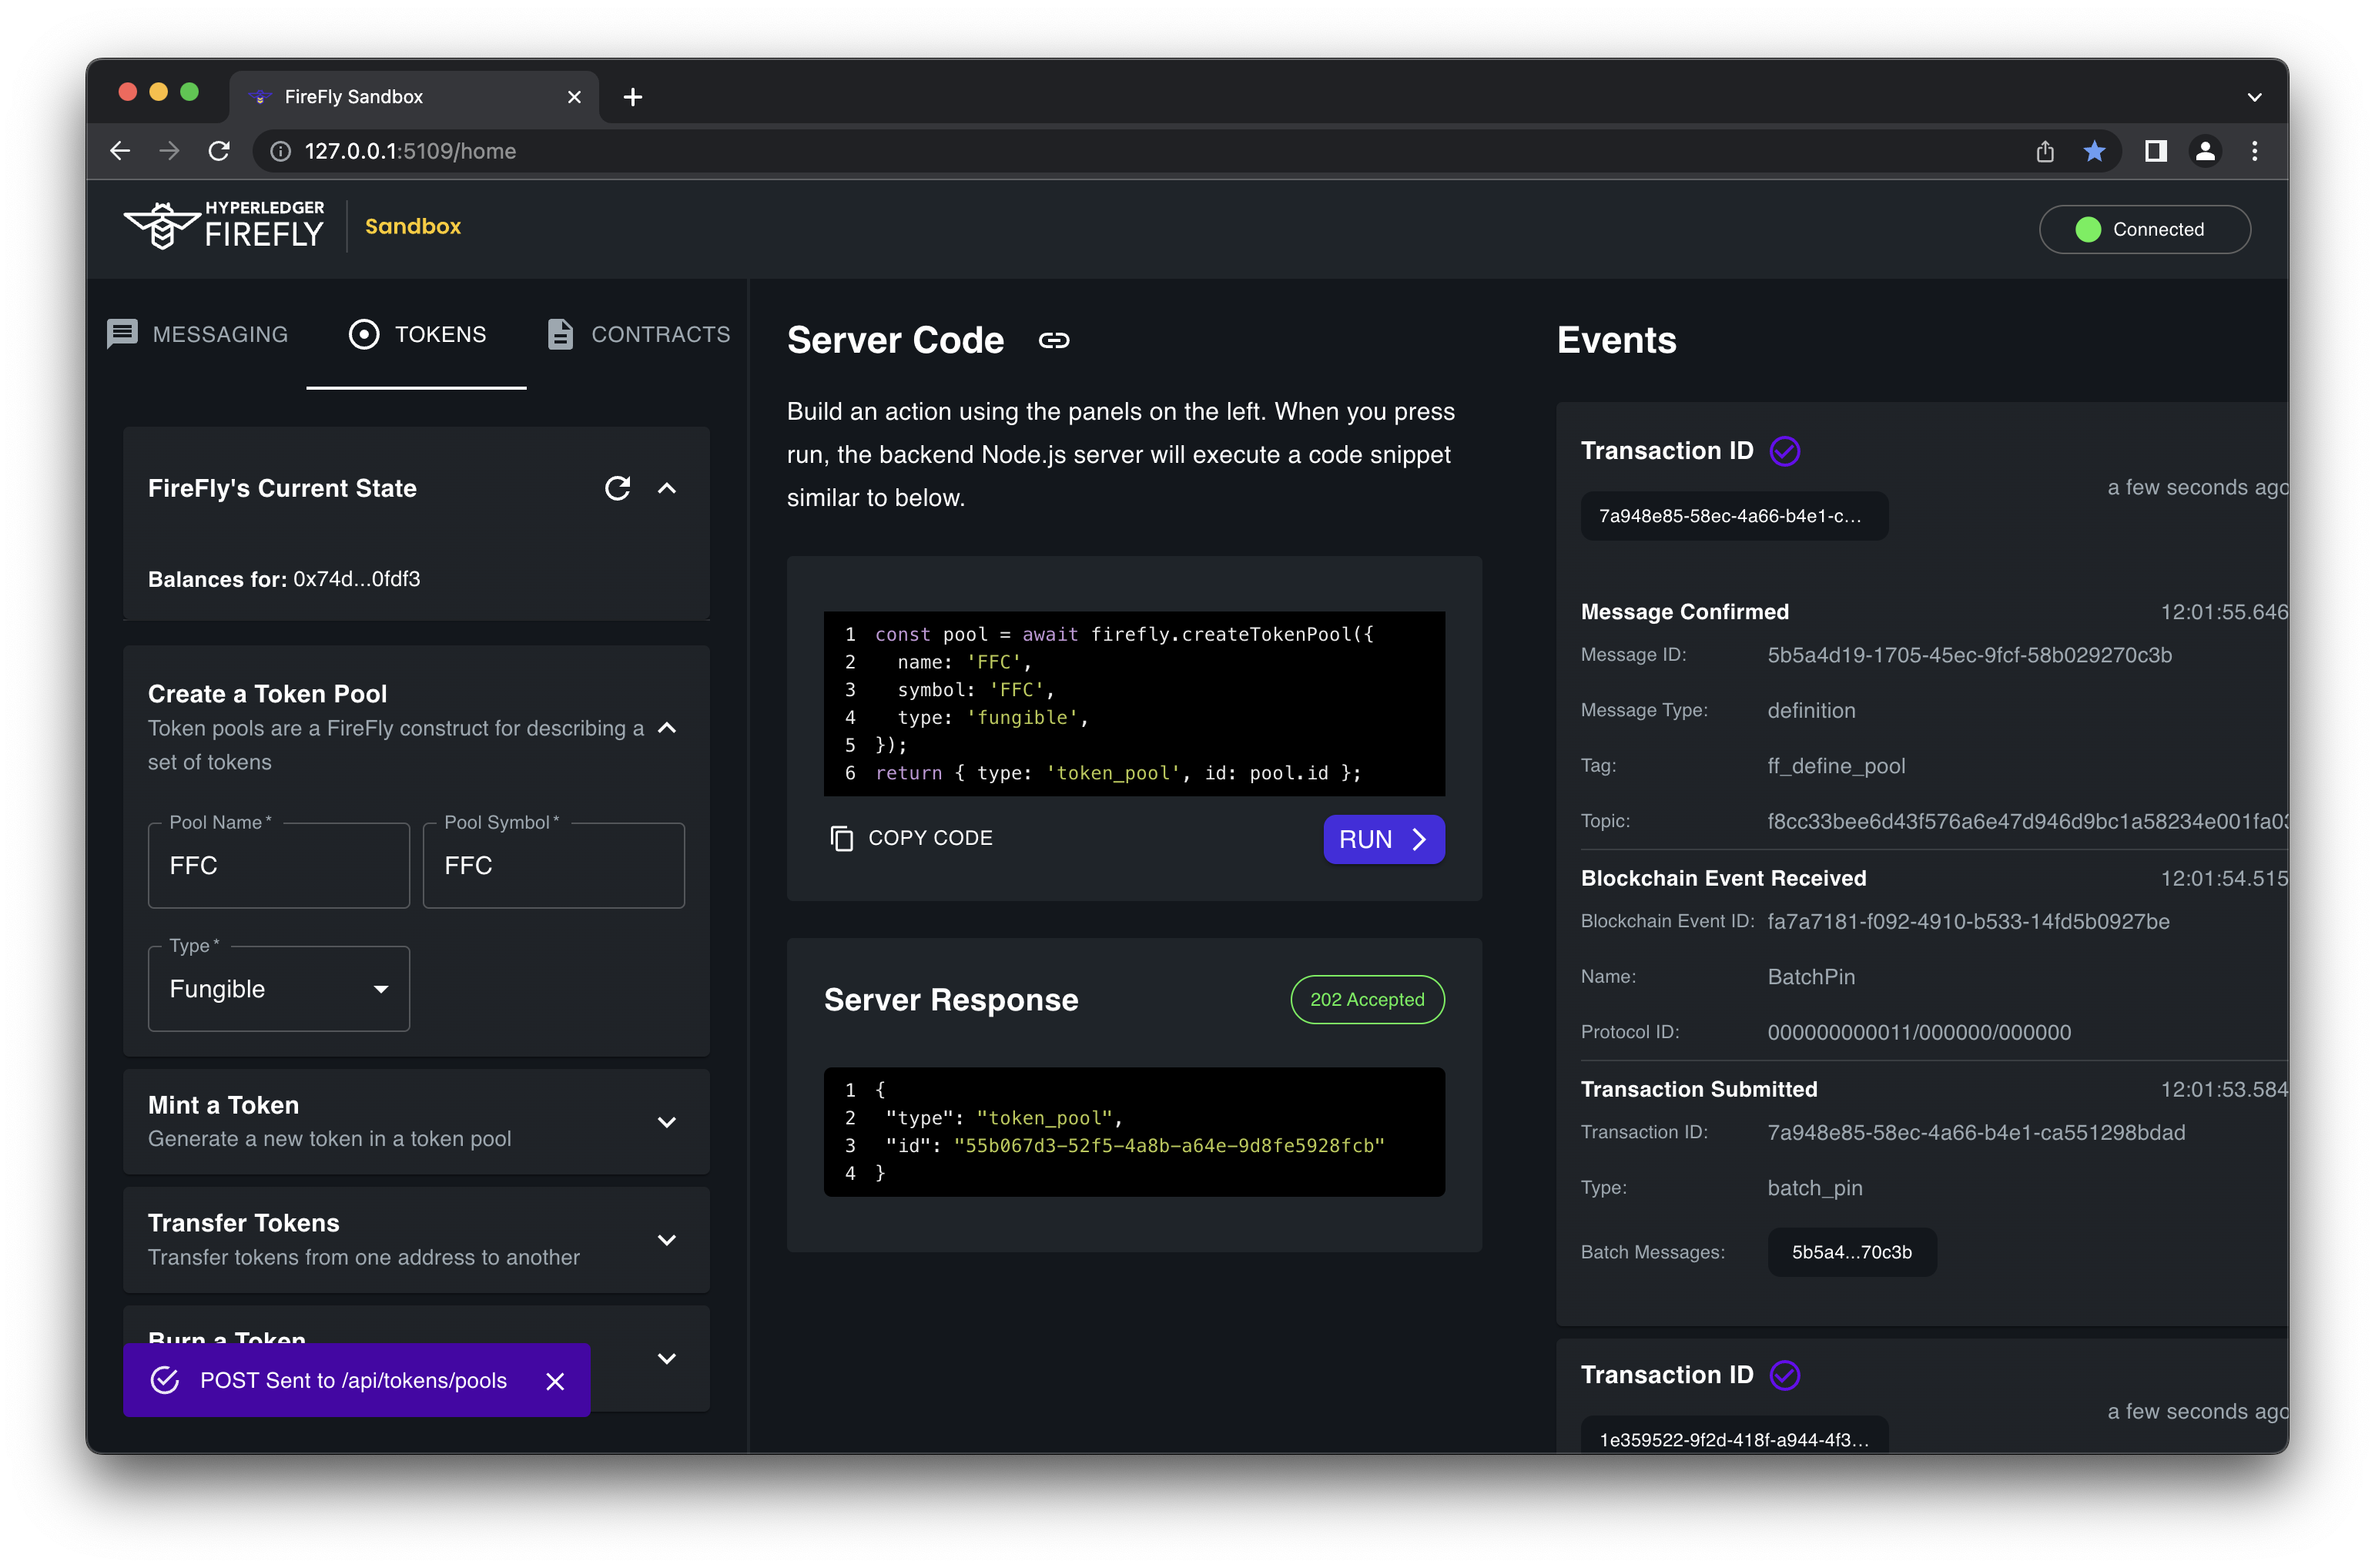
Create a pool
After your stack is up and running, the first thing you need to do is create a Token Pool. Every application will need at least one Token Pool. At a minimum, you must always
specify a name and type for the pool.
If you’re using the default ERC-20 / ERC-721 token connector and its sample token factory, it will automatically deploy a new token contract, based on the type in the request to create the token pool.
Request
POST http://127.0.0.1:5000/api/v1/namespaces/default/tokens/pools
{
  "name": "testpool",
  "type": "fungible"
}
Response
{
    "id": "e1477ed5-7282-48e5-ad9d-1612296bb29d",
    "type": "fungible",
    "namespace": "default",
    "name": "testpool",
    "key": "0x14ddd36a0c2f747130915bf5214061b1e4bec74c",
    "connector": "erc20_erc721",
    "tx": {
        "type": "token_pool",
        "id": "e901921e-ffc4-4776-b20a-9e9face70a47"
    }
}
Other parameters:
- You must specify a
connectorif you have configured multiple token connectors - You may pass through a
configobject of additional parameters, if supported by your token connector - You may specify a
keyunderstood by the connector (i.e. an Ethereum address) if you’d like to use a non-default signing identity
Get the address of the deployed contract
To lookup the address of the new contract, you can lookup the Token Pool by its ID on the API. Creating the token pool will also emit an event which will contain the address. To query the token pool you can make a GET request to the pool’s ID:
Request
GET http://127.0.0.1:5000/api/v1/namespaces/default/tokens/pools/5811e8d5-52d0-44b1-8b75-73f5ff88f598
Response
{
    "id": "e1477ed5-7282-48e5-ad9d-1612296bb29d",
    "type": "fungible",
    "namespace": "default",
    "name": "testpool",
    "standard": "ERC20",
    "locator": "address=0xc4d02efcfab06f18ec0a68e00b98ffecf6bf7e3c&schema=ERC20WithData&type=fungible",
    "decimals": 18,
    "connector": "erc20_erc721",
    "message": "7e2f6004-31fd-4ba8-9845-15c5fe5fbcd7",
    "state": "confirmed",
    "created": "2022-04-28T14:03:16.732222381Z",
    "info": {
        "address": "0xc4d02efcfab06f18ec0a68e00b98ffecf6bf7e3c",
        "name": "testpool",
        "schema": "ERC20WithData"
    },
    "tx": {
        "type": "token_pool",
        "id": "e901921e-ffc4-4776-b20a-9e9face70a47"
    }
}
Create a pool for an existing contract
If you wish to use a contract that is already on the chain, you can pass the address in a config object with an address when you make the request to create the Token Pool.
POST http://127.0.0.1:5000/api/v1/namespaces/default/tokens/pools
{
  "name": "testpool",
  "type": "fungible",
  "config": {
    "address": "0xb1C845D32966c79E23f733742Ed7fCe4B41901FC"
  }
}
Mint tokens
Once you have a token pool, you can mint tokens within it. With a token contract deployed by the default token factory, only the creator of a pool is allowed to mint, but a different contract may define its own permission model.
NOTE: The default token factory creates an ERC-20 with 18 decimal places. This means that if you want to create 100 tokens, the number submitted to the API / blockchain should actually be 100×1018 =
100000000000000000000. This allows users to work with “fractional” tokens even though Ethereum virtual machines only support integer arithmetic.
Request
POST http://127.0.0.1:5000/api/v1/namespaces/default/tokens/mint
{
  "amount": "100000000000000000000"
}
Response
{
    "type": "mint",
    "localId": "835fe2a1-594b-4336-bc1d-b2f59d51064b",
    "pool": "e1477ed5-7282-48e5-ad9d-1612296bb29d",
    "connector": "erc20_erc721",
    "key": "0x14ddd36a0c2f747130915bf5214061b1e4bec74c",
    "from": "0x14ddd36a0c2f747130915bf5214061b1e4bec74c",
    "to": "0x14ddd36a0c2f747130915bf5214061b1e4bec74c",
    "amount": "100000000000000000000",
    "tx": {
        "type": "token_transfer",
        "id": "3fc97e24-fde1-4e80-bd82-660e479c0c43"
    }
}
Other parameters:
- You must specify a
poolname if you’ve created more than one pool - You may specify a
keyunderstood by the connector (i.e. an Ethereum address) if you’d like to use a non-default signing identity - You may specify
toif you’d like to send the minted tokens to a specific identity (default is the same askey)
Transfer tokens
You may transfer tokens within a pool by specifying an amount and a destination understood by the connector (i.e. an Ethereum address). With a token contract deployed by the default token factory, only the owner of the tokens or another approved account may transfer their tokens, but a different contract may define its own permission model.
Request
POST http://127.0.0.1:5000/api/v1/namespaces/default/tokens/transfers
{
  "amount": "10000000000000000000",
  "to": "0xa4222a4ae19448d43a338e6586edd5fb2ac398e1"
}
Response
{
    "type": "transfer",
    "localId": "61f0a71f-712b-4778-8b37-784fbee52657",
    "pool": "e1477ed5-7282-48e5-ad9d-1612296bb29d",
    "connector": "erc20_erc721",
    "key": "0x14ddd36a0c2f747130915bf5214061b1e4bec74c",
    "from": "0x14ddd36a0c2f747130915bf5214061b1e4bec74c",
    "to": "0xa4222a4ae19448d43a338e6586edd5fb2ac398e1",
    "amount": "10000000000000000000",
    "tx": {
        "type": "token_transfer",
        "id": "c0c316a3-23a9-42f3-89b3-1cfdba6c948d"
    }
}
Other parameters:
- You must specify a
poolname if you’ve created more than one pool - You may specify a
keyunderstood by the connector (i.e. an Ethereum address) if you’d like to use a non-default signing identity - You may specify
fromif you’d like to send tokens from a specific identity (default is the same askey)
Sending data with a transfer
All transfers (as well as mint/burn operations) support an optional message parameter that contains a broadcast or private
message to be sent along with the transfer. This message follows the same convention as other FireFly messages, and may be comprised
of text or blob data, and can provide context, metadata, or other supporting information about the transfer. The message will be
batched, hashed, and pinned to the primary blockchain.
The message ID and hash will also be sent to the token connector as part of the transfer operation, to be written to the token blockchain when the transaction is submitted. All recipients of the message will then be able to correlate the message with the token transfer.
POST http://127.0.0.1:5000/api/v1/namespaces/default/tokens/transfers
Broadcast message
{
  "amount": 1,
  "to": "0x07eab7731db665caf02bc92c286f51dea81f923f",
  "message": {
    "data": [{
      "value": "payment for goods"
    }]
  }
}
Private message
{
  "amount": 1,
  "to": "0x07eab7731db665caf02bc92c286f51dea81f923f",
  "message": {
    "header": {
      "type": "transfer_private",
    },
    "group": {
      "members": [{
          "identity": "org_1"
      }]
    },
    "data": [{
      "value": "payment for goods"
    }]
  }
}
Note that all parties in the network will be able to see the transfer (including the message ID and hash), but only the recipients of the message will be able to view the actual message data.
Burn tokens
You may burn tokens by simply specifying an amount. With a token contract deployed by the default token factory, only the owner of a token may burn it, but a different contract may define its own permission model.
POST http://127.0.0.1:5000/api/v1/namespaces/default/tokens/burn
{
  "amount": 1,
}
Other parameters:
- You must specify a
poolname if you’ve created more than one pool - You may specify a
keyunderstood by the connector (i.e. an Ethereum address) if you’d like to use a non-default signing identity - You may specify
fromif you’d like to burn tokens from a specific identity (default is the same askey)
Token approvals
You can also approve other wallets to transfer tokens on your behalf with the /approvals API. The important fields in a token approval API request are as follows:
approved: Sets whether another account is allowed to transfer tokens out of this wallet or not. If not specified, will default totrue. Setting tofalsecan revoke an existing approval.operator: The other account that is allowed to transfer tokens out of the wallet specified in thekeyfieldconfig.allowance: The number of tokens the other account is allowed to transfer. If0or not set, the approval is valid for any number.key: The wallet address for the approval. If not set, it defaults to the address of the FireFly node submitting the transaction
Here is an example request that would let the signing account 0x634ee8c7d0894d086c7af1fc8514736aed251528 transfer up to 10×1018 (10000000000000000000) tokens from my wallet
Request
POST http://127.0.0.1:5000/api/v1/namespaces/default/tokens/approvals
{
  "operator": "0x634ee8c7d0894d086c7af1fc8514736aed251528",
  "config": {
      "allowance": "10000000000000000000"
  }
}
Response
{
    "localId": "46fef50a-cf93-4f92-acf8-fae161b37362",
    "pool": "e1477ed5-7282-48e5-ad9d-1612296bb29d",
    "connector": "erc20_erc721",
    "key": "0x14ddd36a0c2f747130915bf5214061b1e4bec74c",
    "operator": "0x634ee8c7d0894d086c7af1fc8514736aed251528",
    "approved": true,
    "tx": {
        "type": "token_approval",
        "id": "00faa011-f42c-403d-a047-2df7318967cd"
    },
    "config": {
        "allowance": "10000000000000000000"
    }
}
Use Metamask
Now that you have an ERC-20 contract up and running, you may be wondering how to use Metamask (or some other wallet) with this contract. This section will walk you through how to connect Metamask to the blockchain and token contract that FireFly is using.
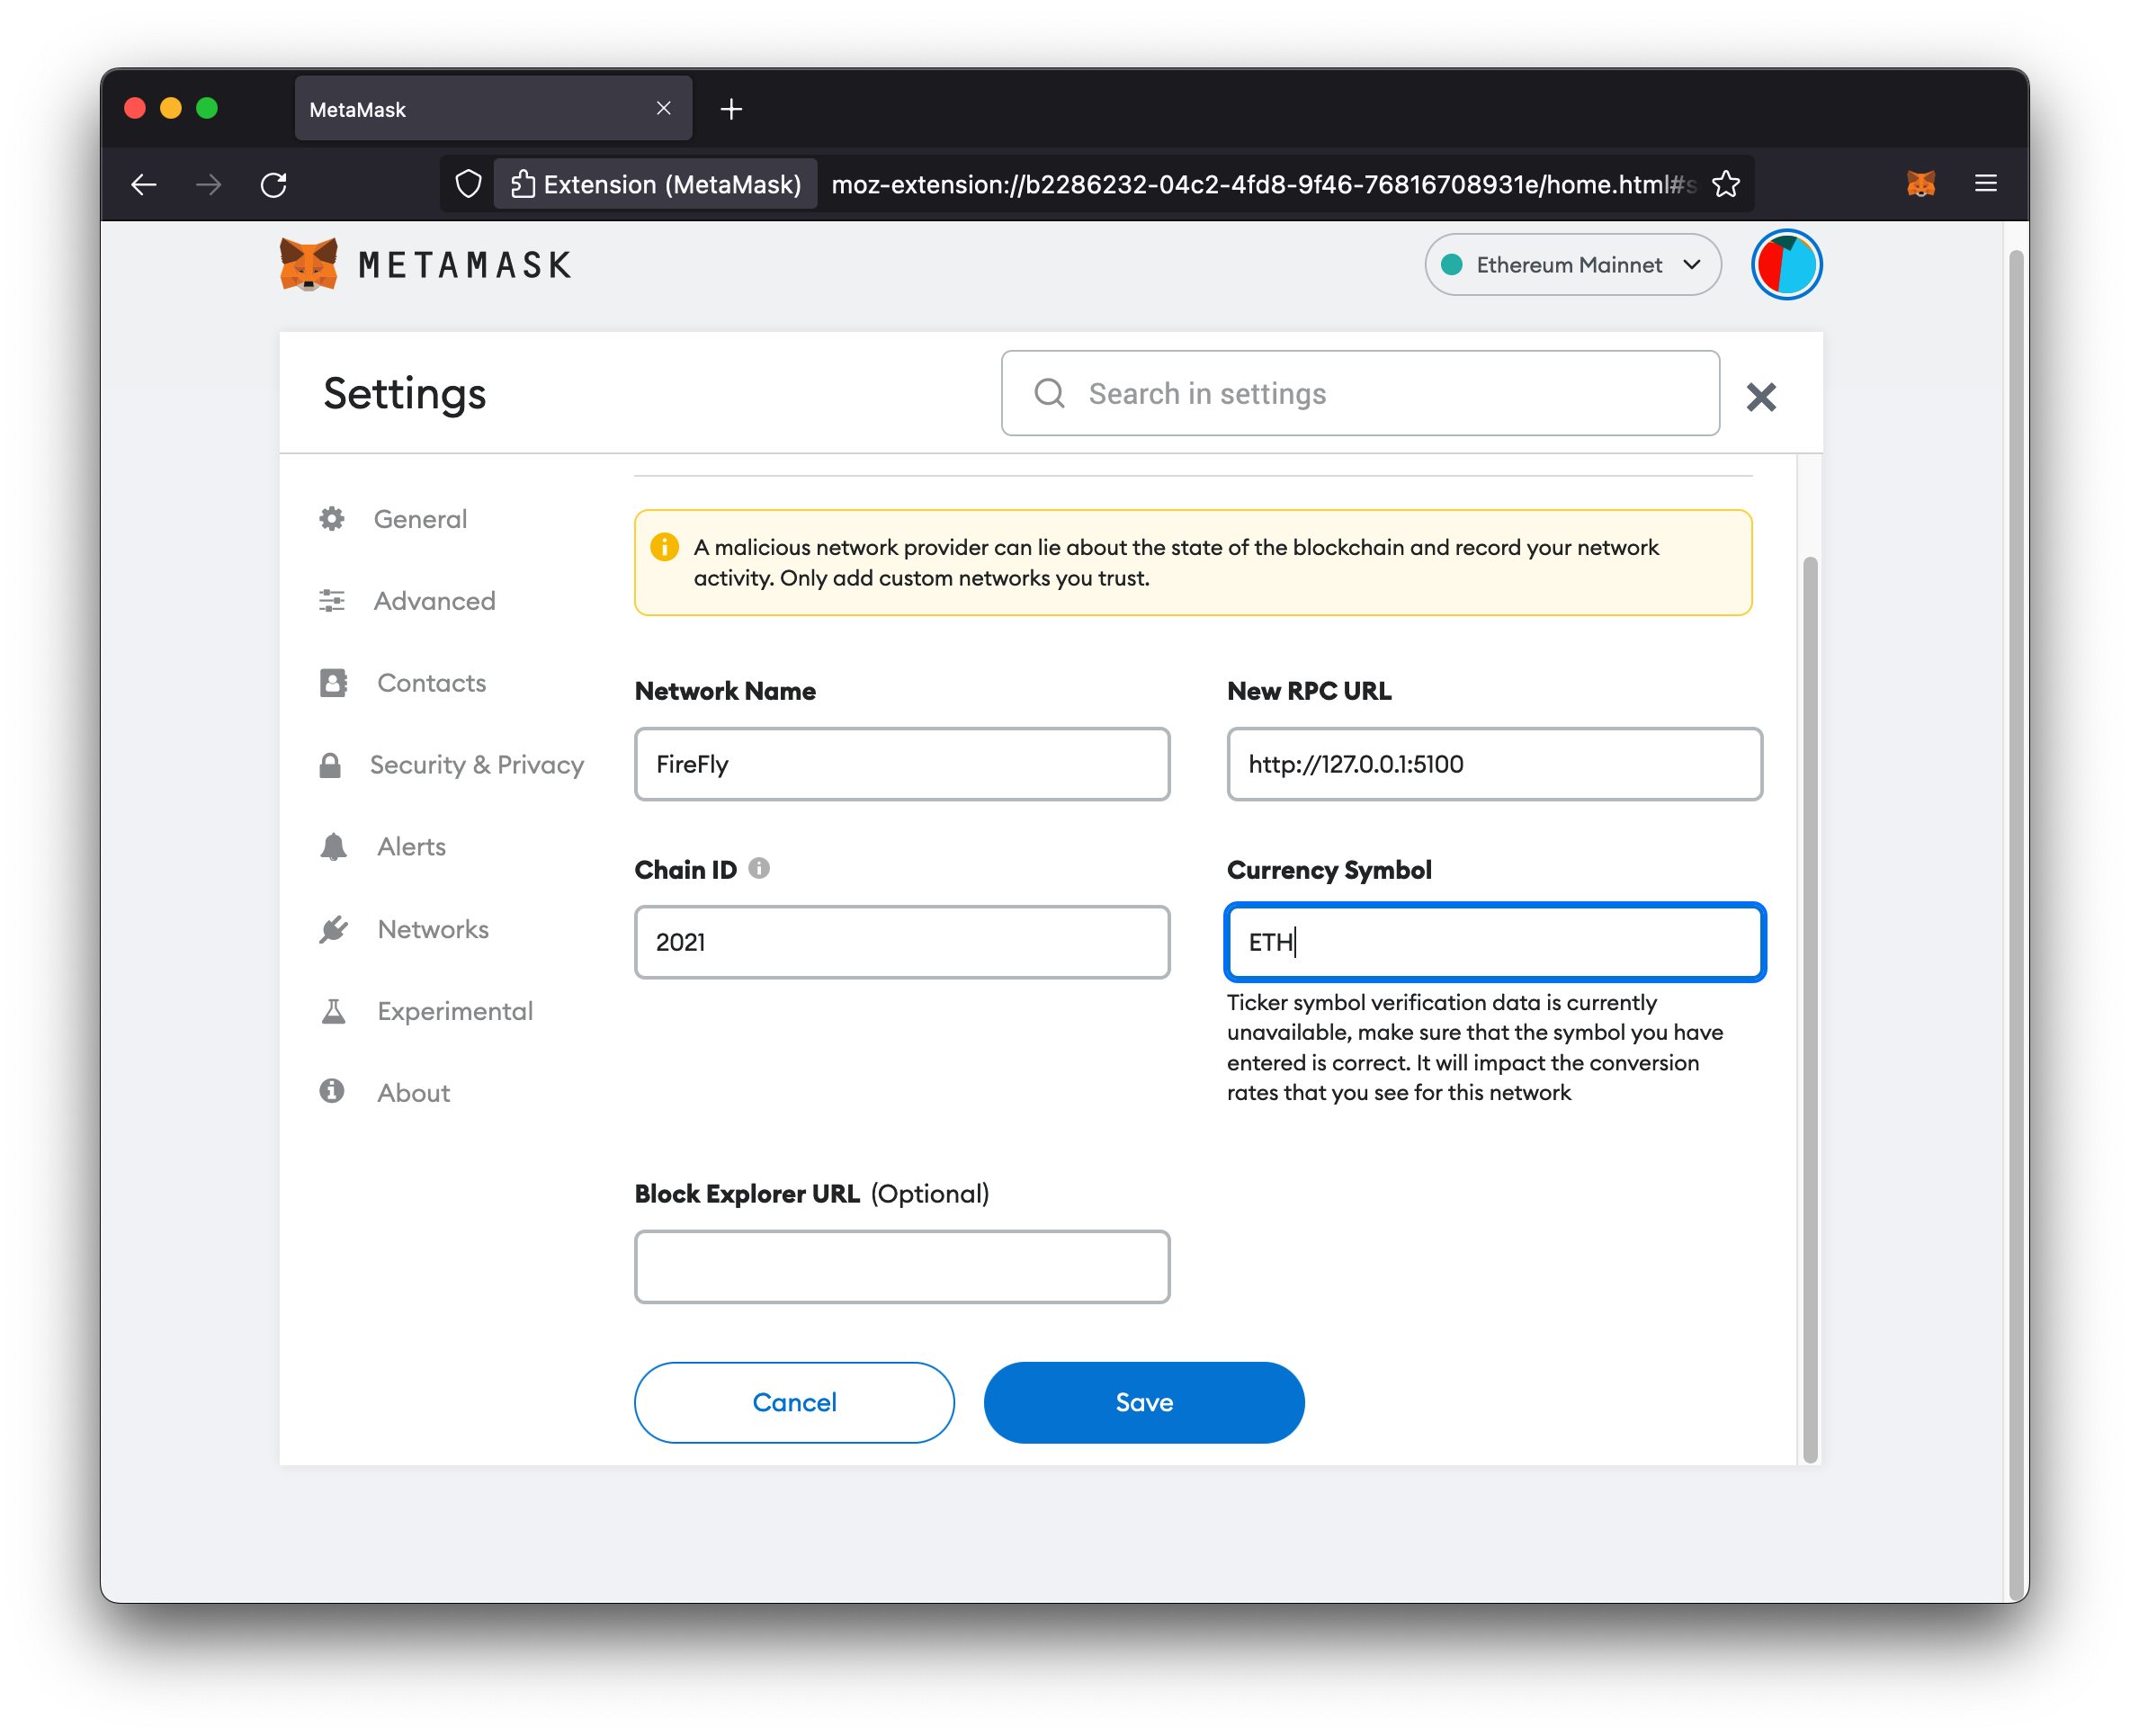
Configure a new network
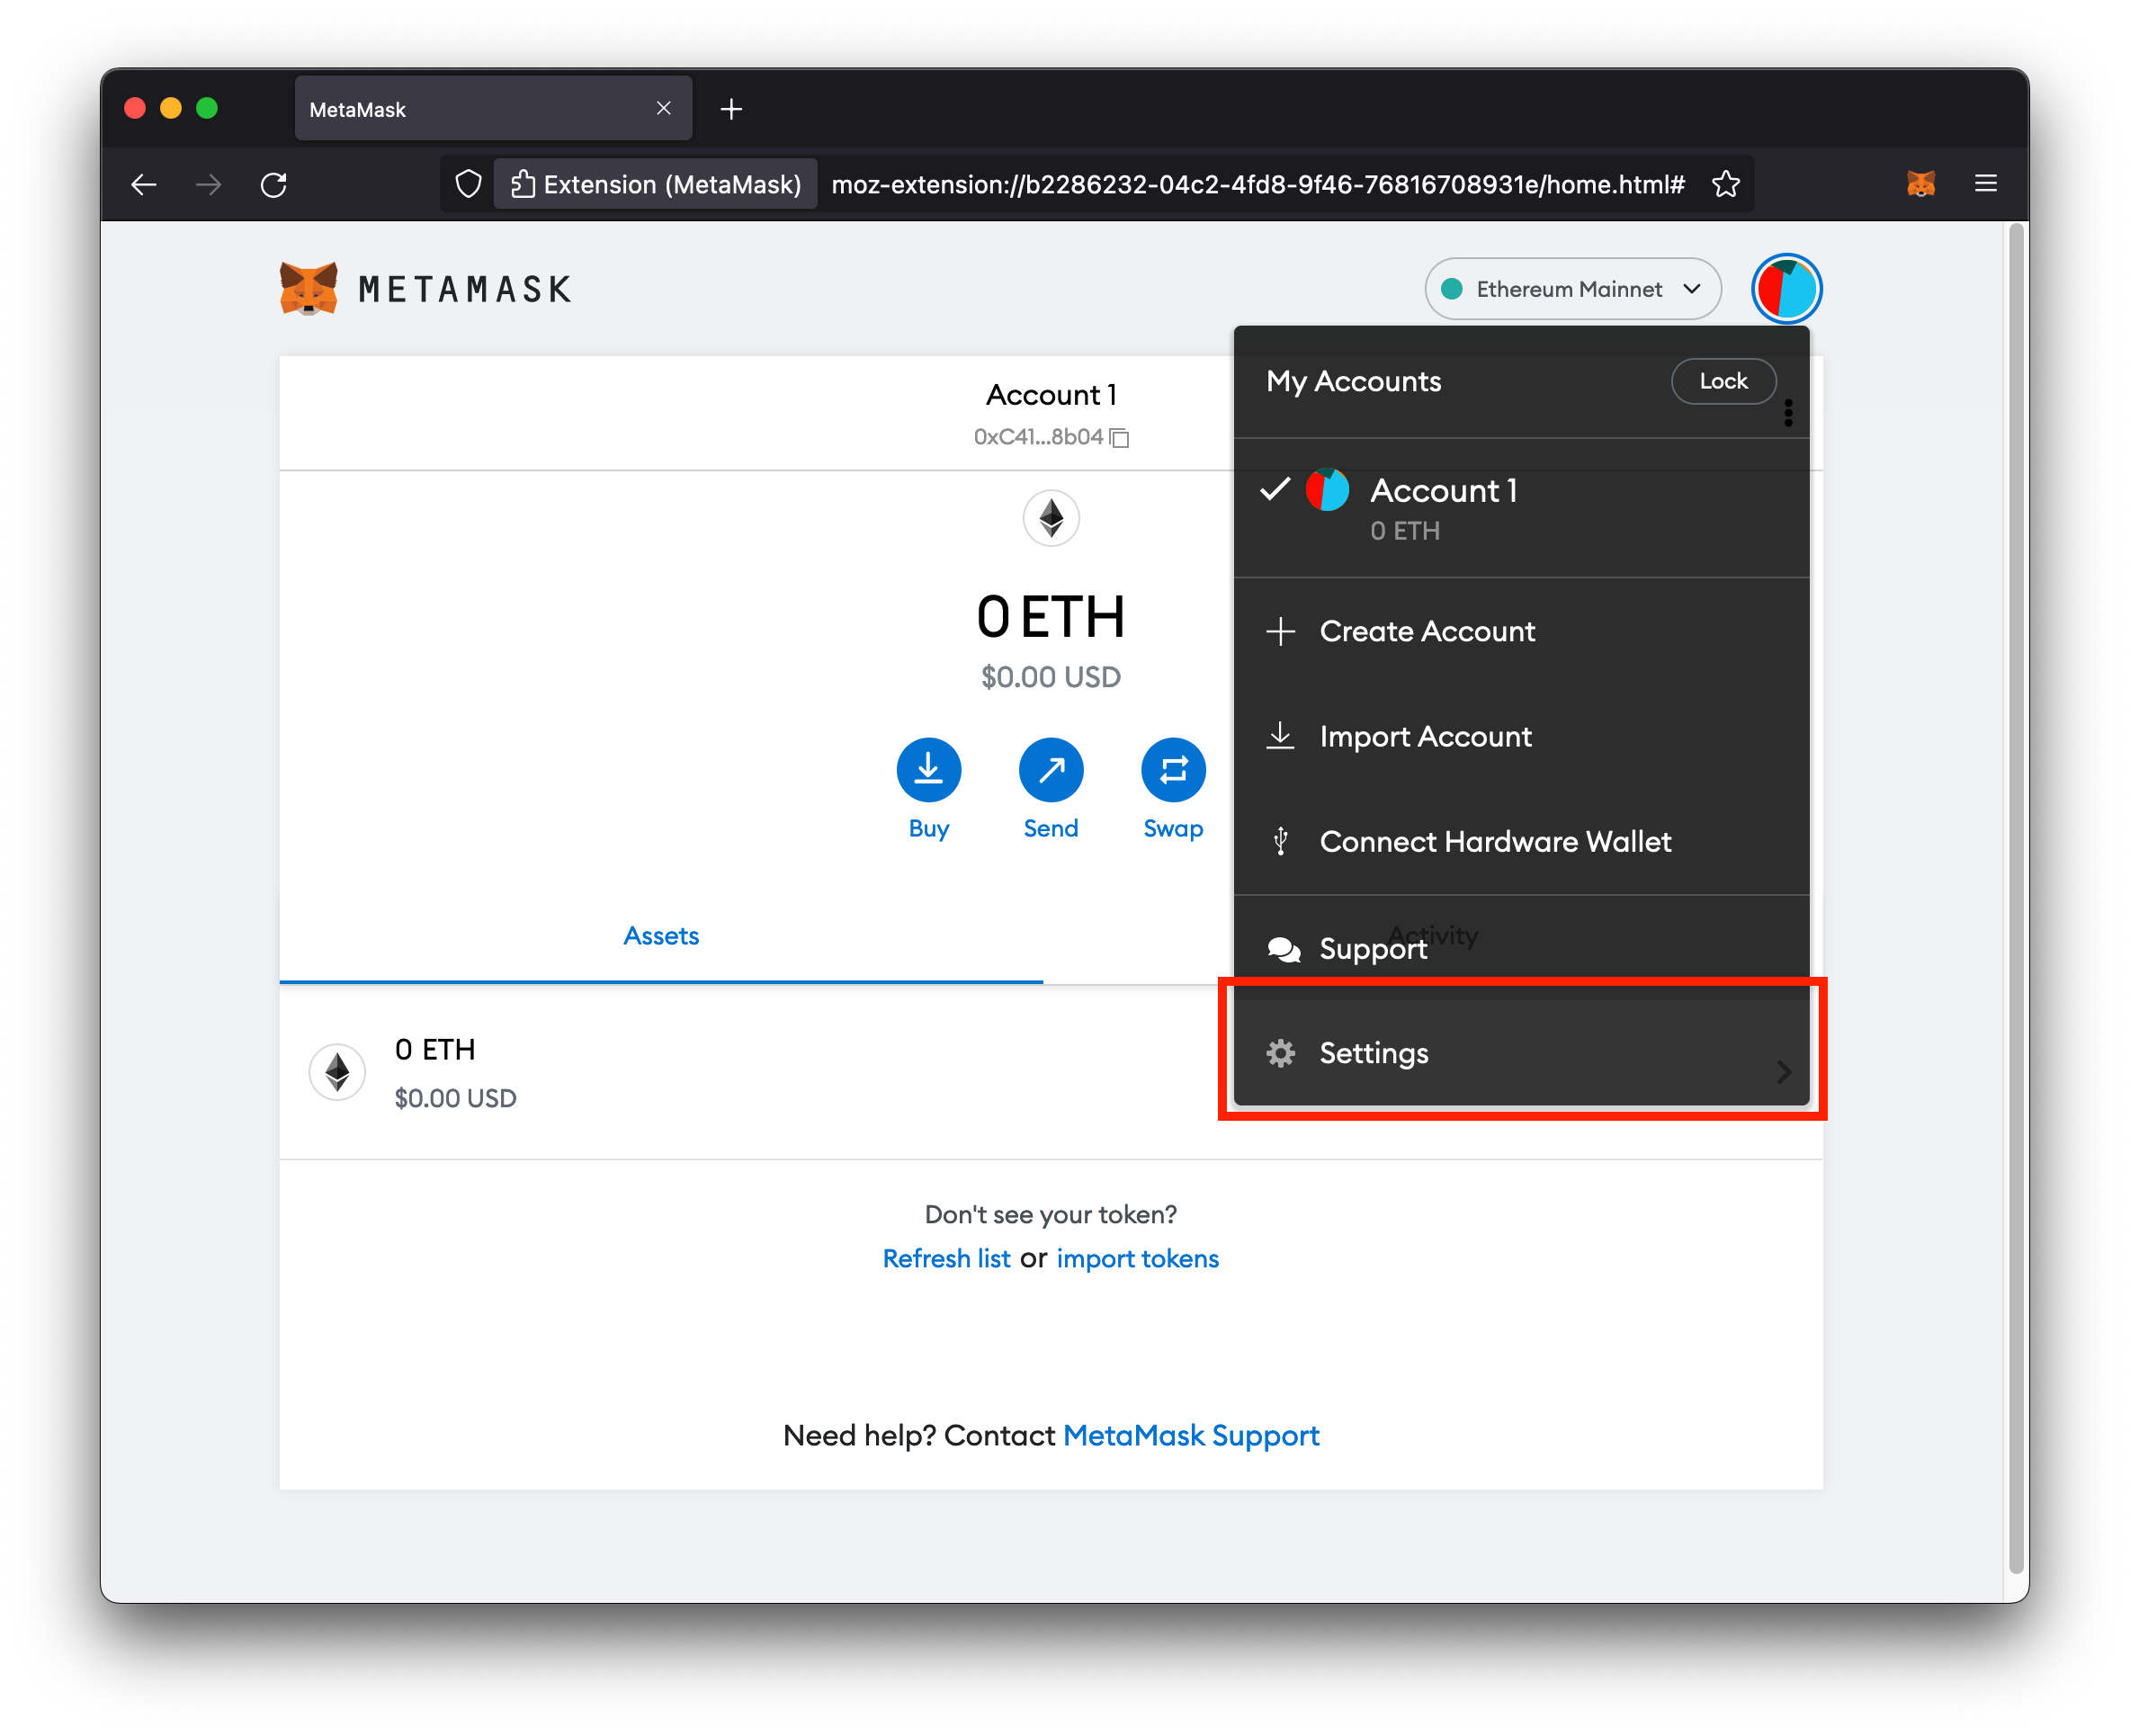
The first thing we need to do is tell Metamask how to connect to our local blockchain node. To do that:
- Click your account icon
-
In the drop down menu, click Settings
- On the left hand side of the page, click Networks
-
Click the Add a network button
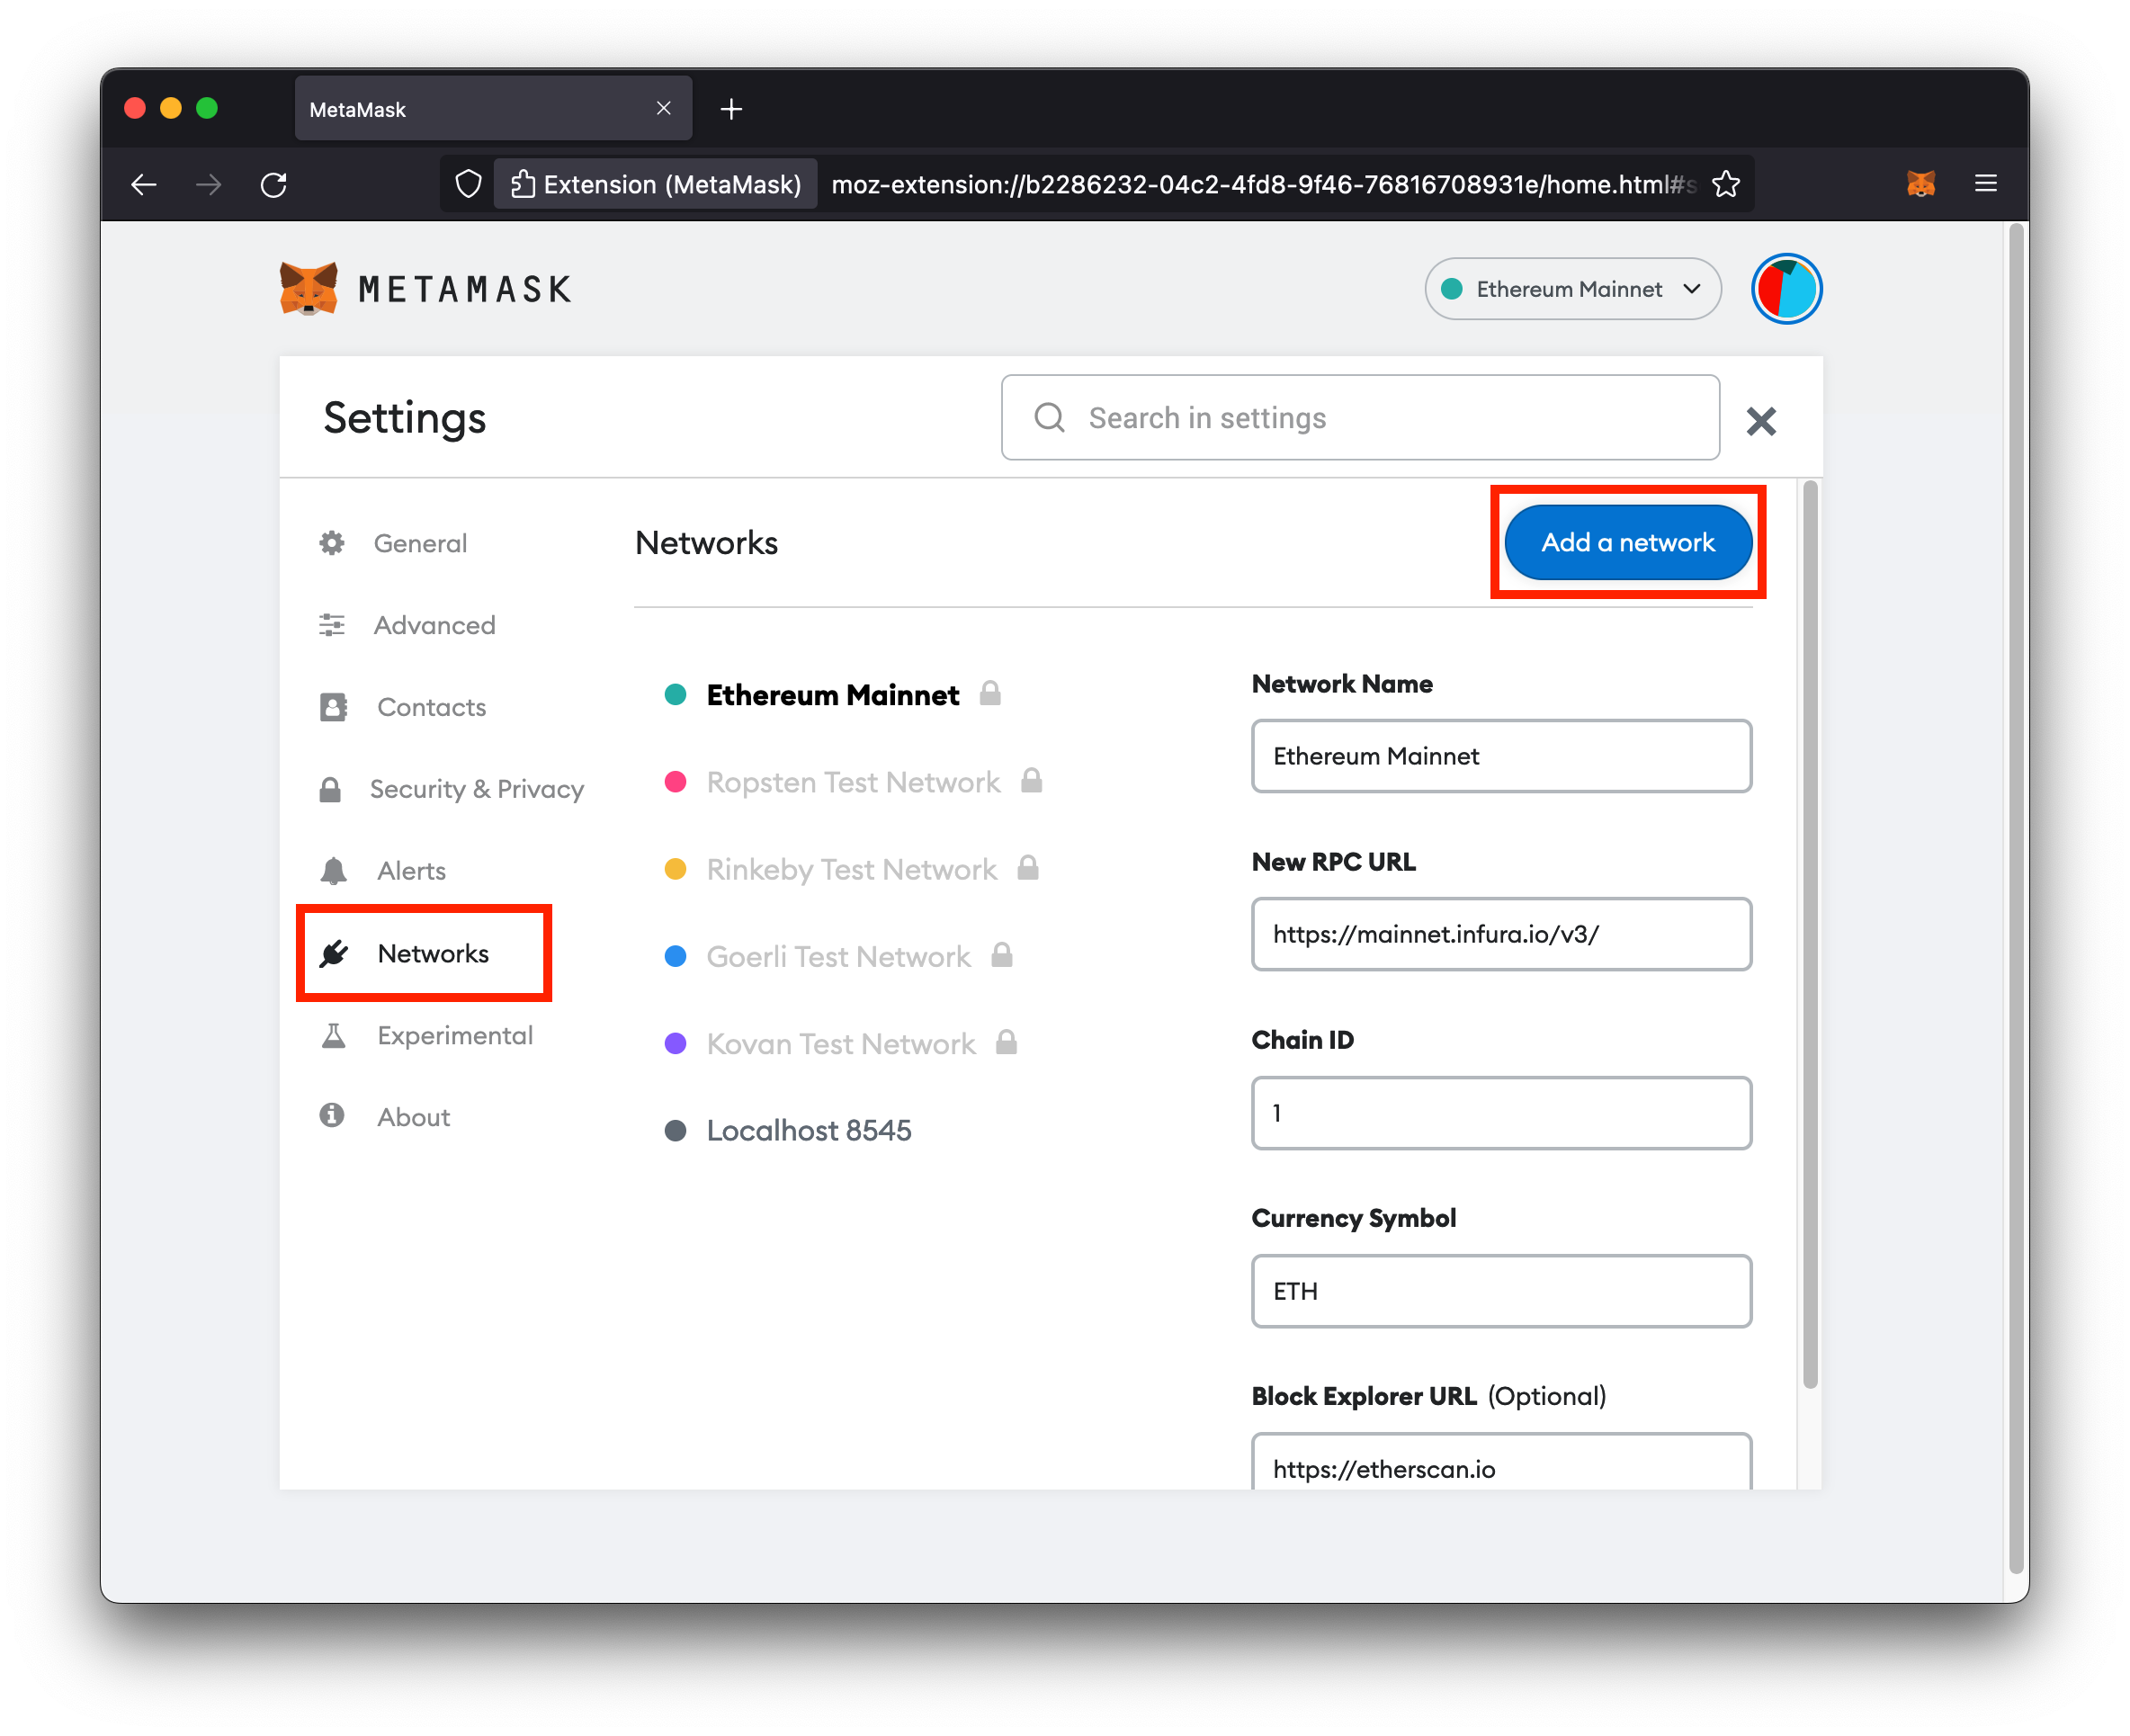
- Fill in the network details:
- Network Name:
FireFly(could be any name) - New RPC URL:
http://127.0.0.1:5100 - Chain ID:
2021 - Currency Symbol: ETH
- Network Name:
- Click Save
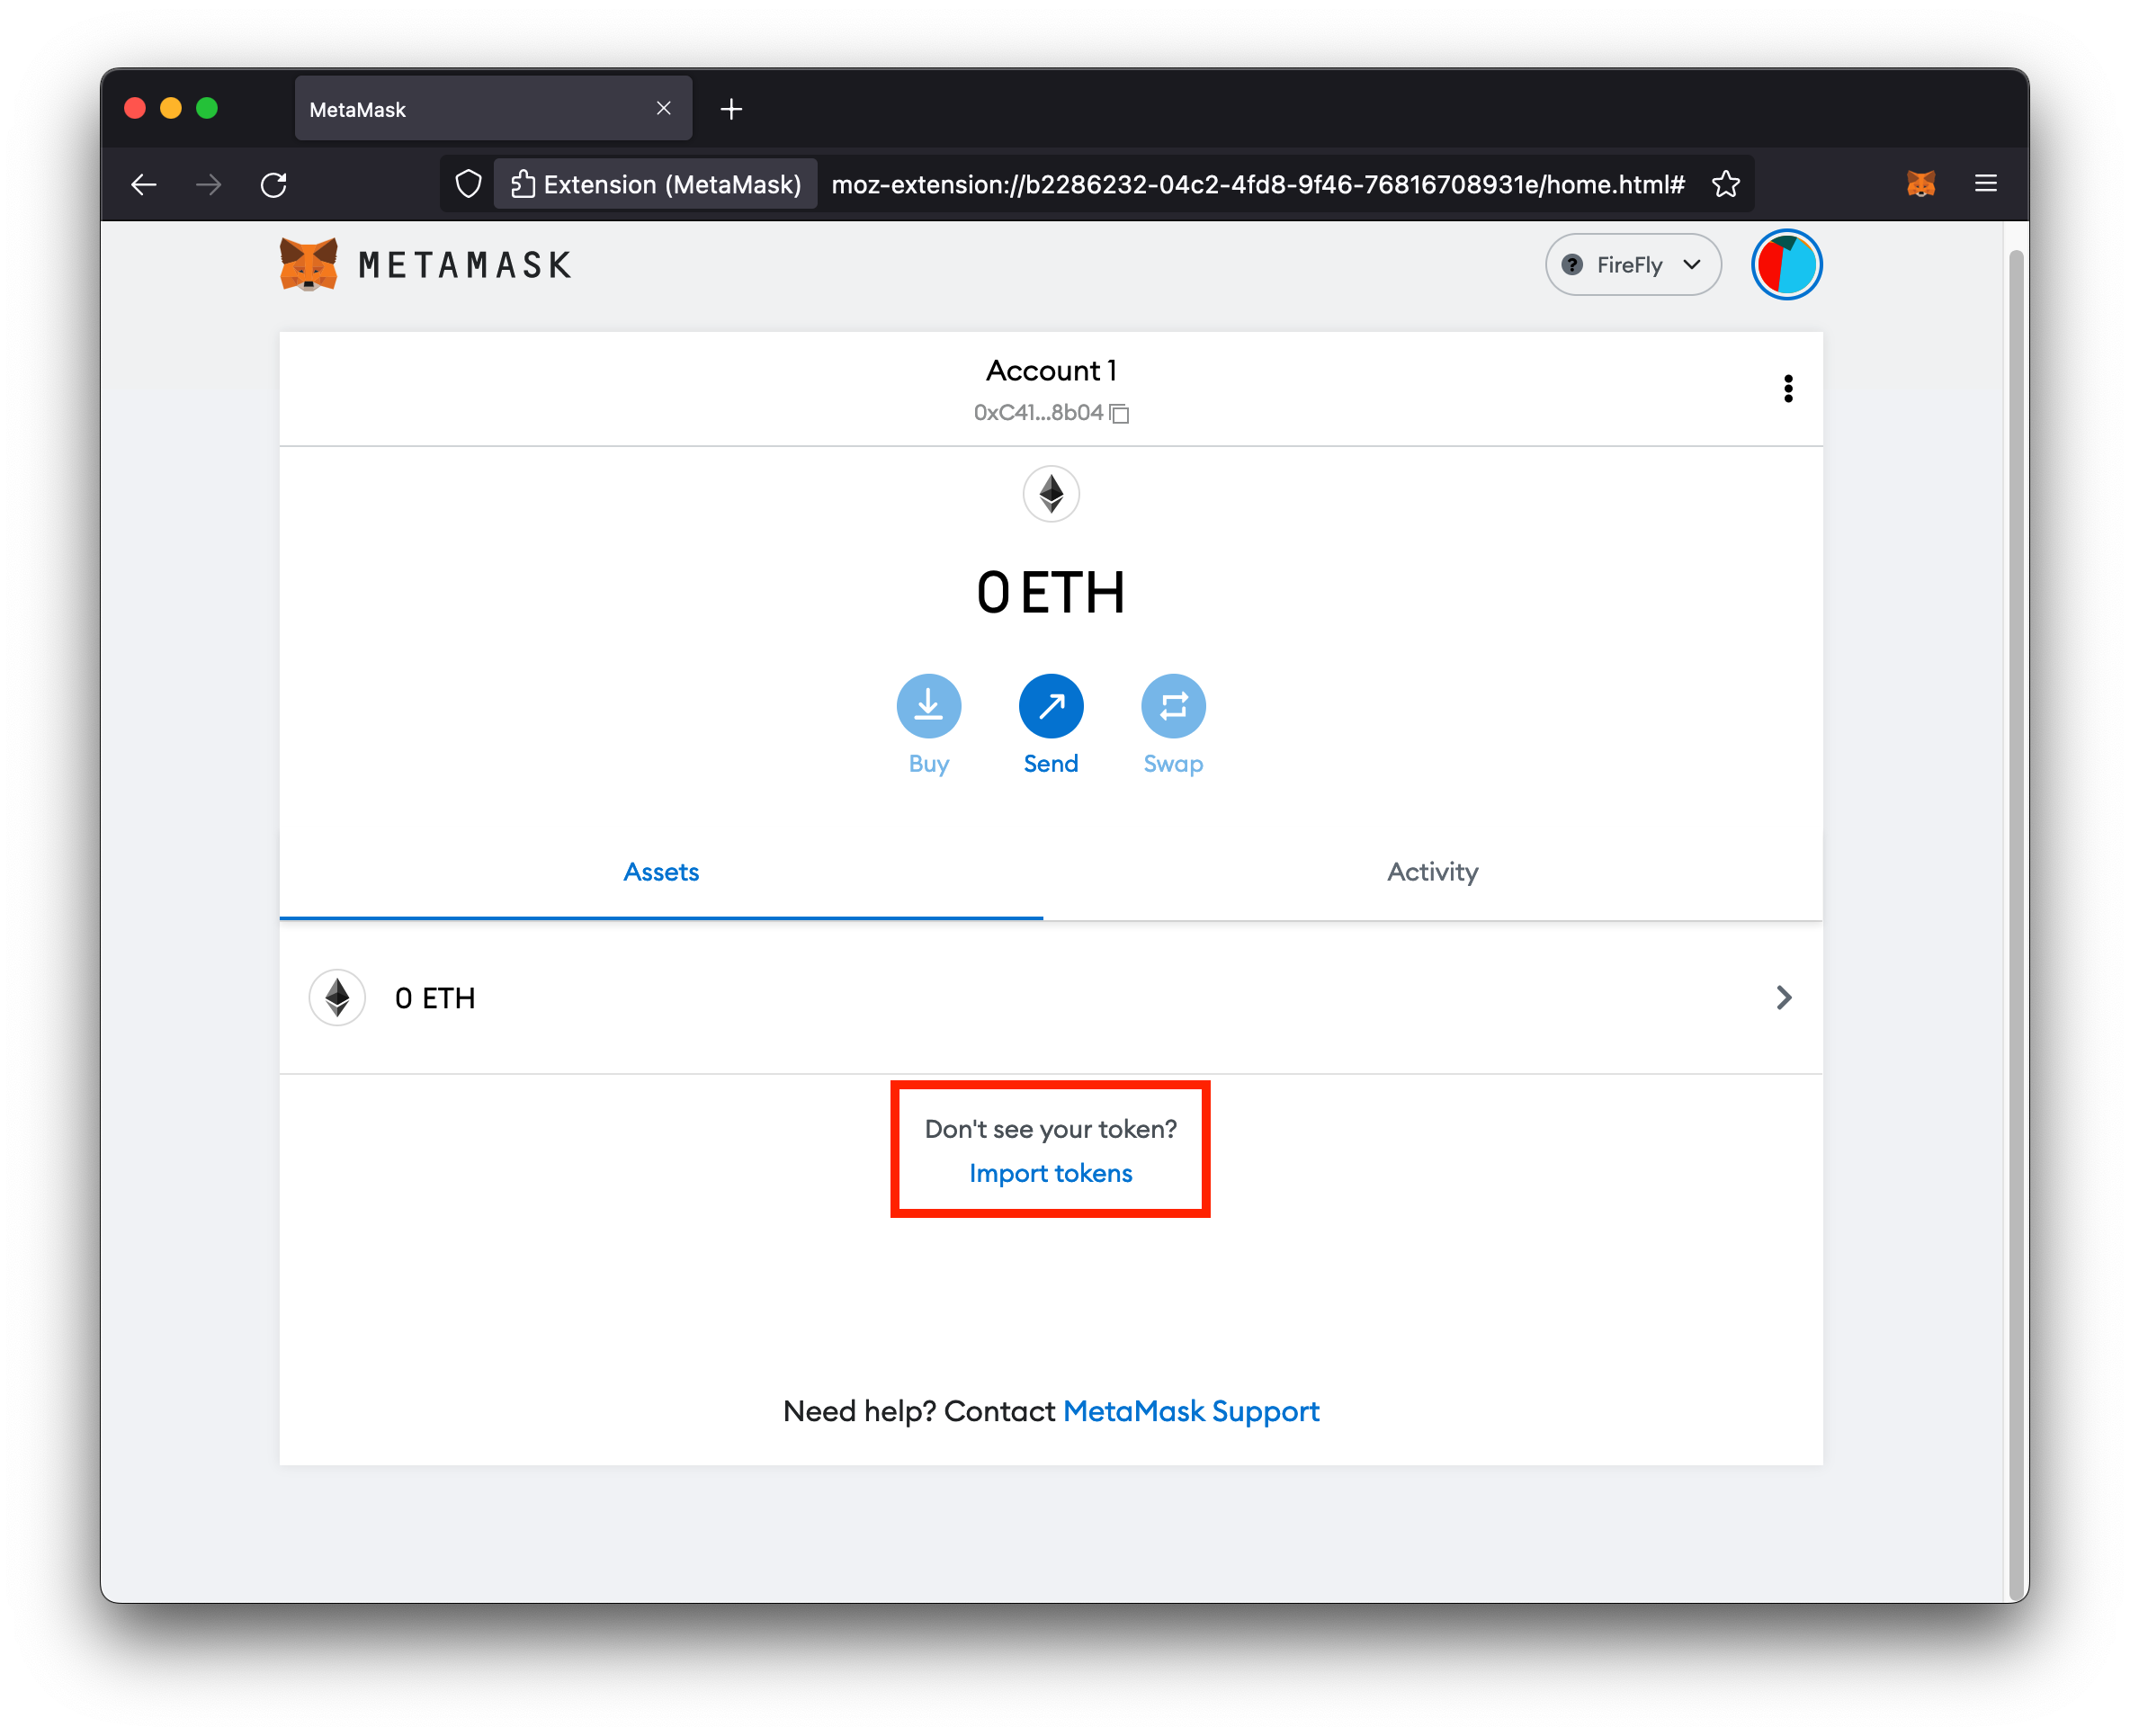
Import tokens
Metamask won’t know about our custom ERC-20 contract until we give it the Ethereum address for the contract, so that’s what we’ll do next.
-
Click on Import tokens
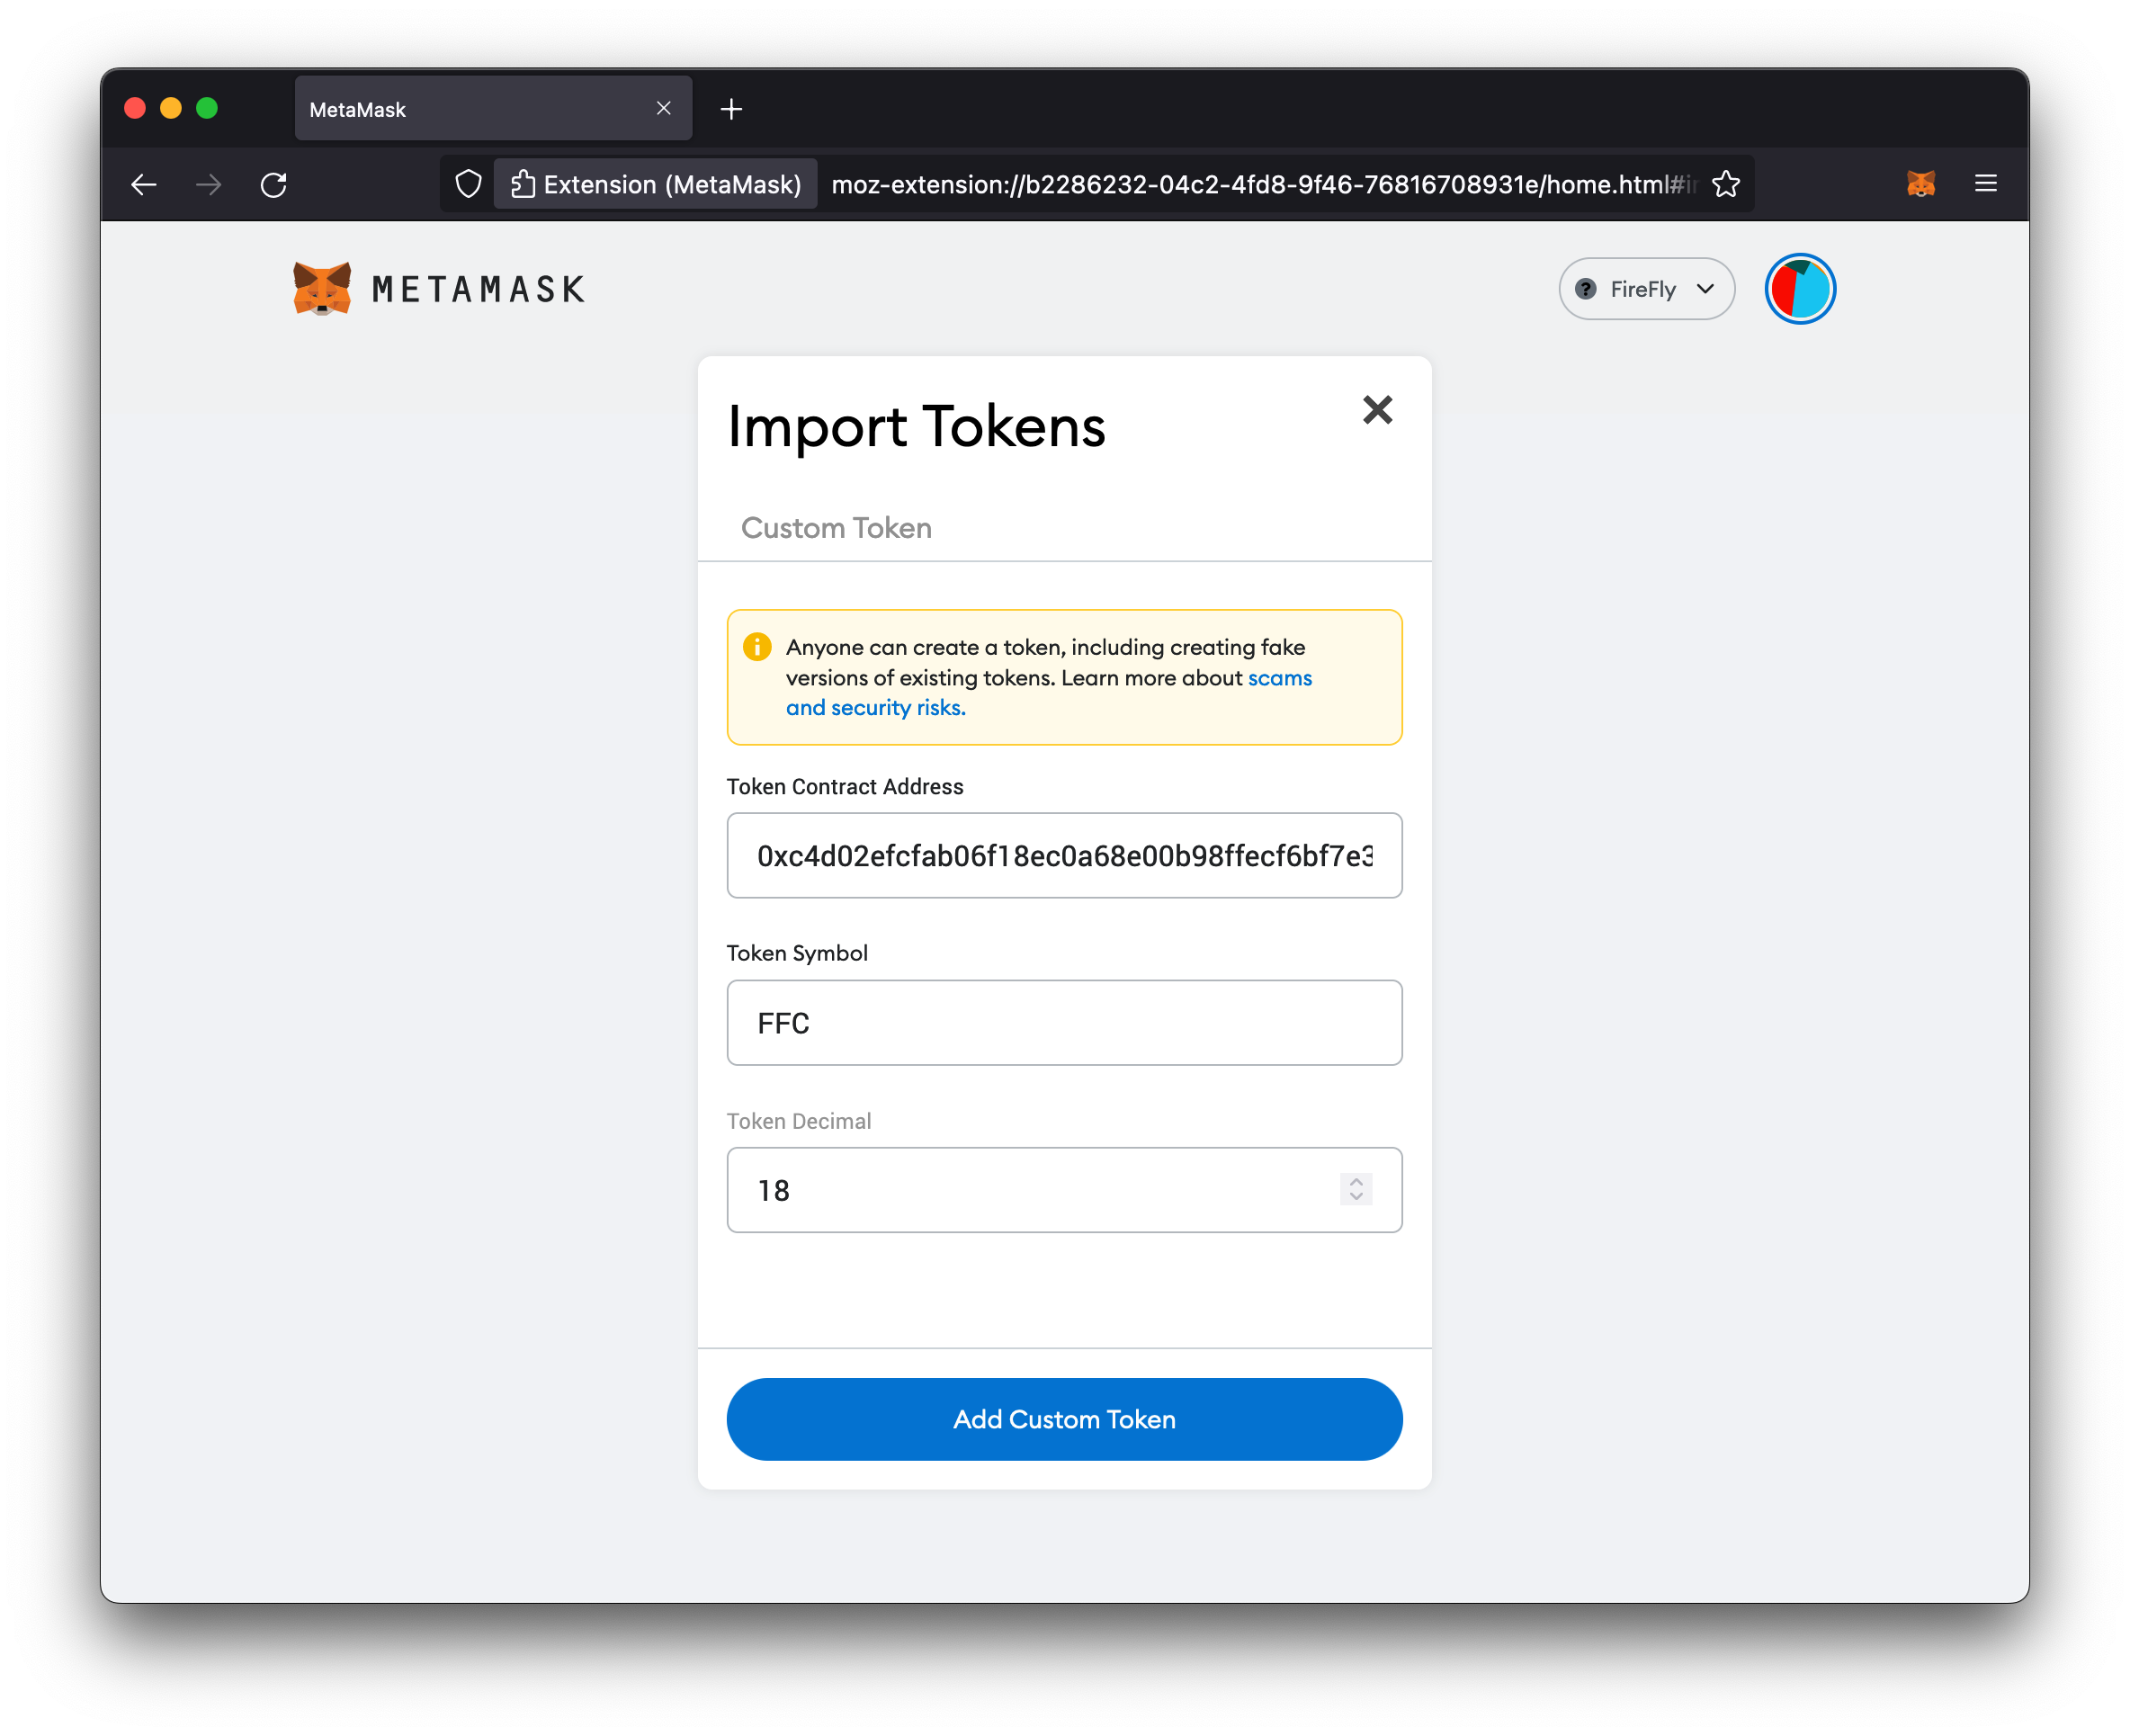
- Enter the Ethereum address of the contract
- Enter a Token Symbol (can be anything you want)
- Click Add Custom Token
NOTE: You can find the address of your contract from the response to the request to create the token pool above. You can also do a
GETtohttp://127.0.0.1:5000/api/v1/namespaces/default/tokens/poolsto lookup your configured token pools.
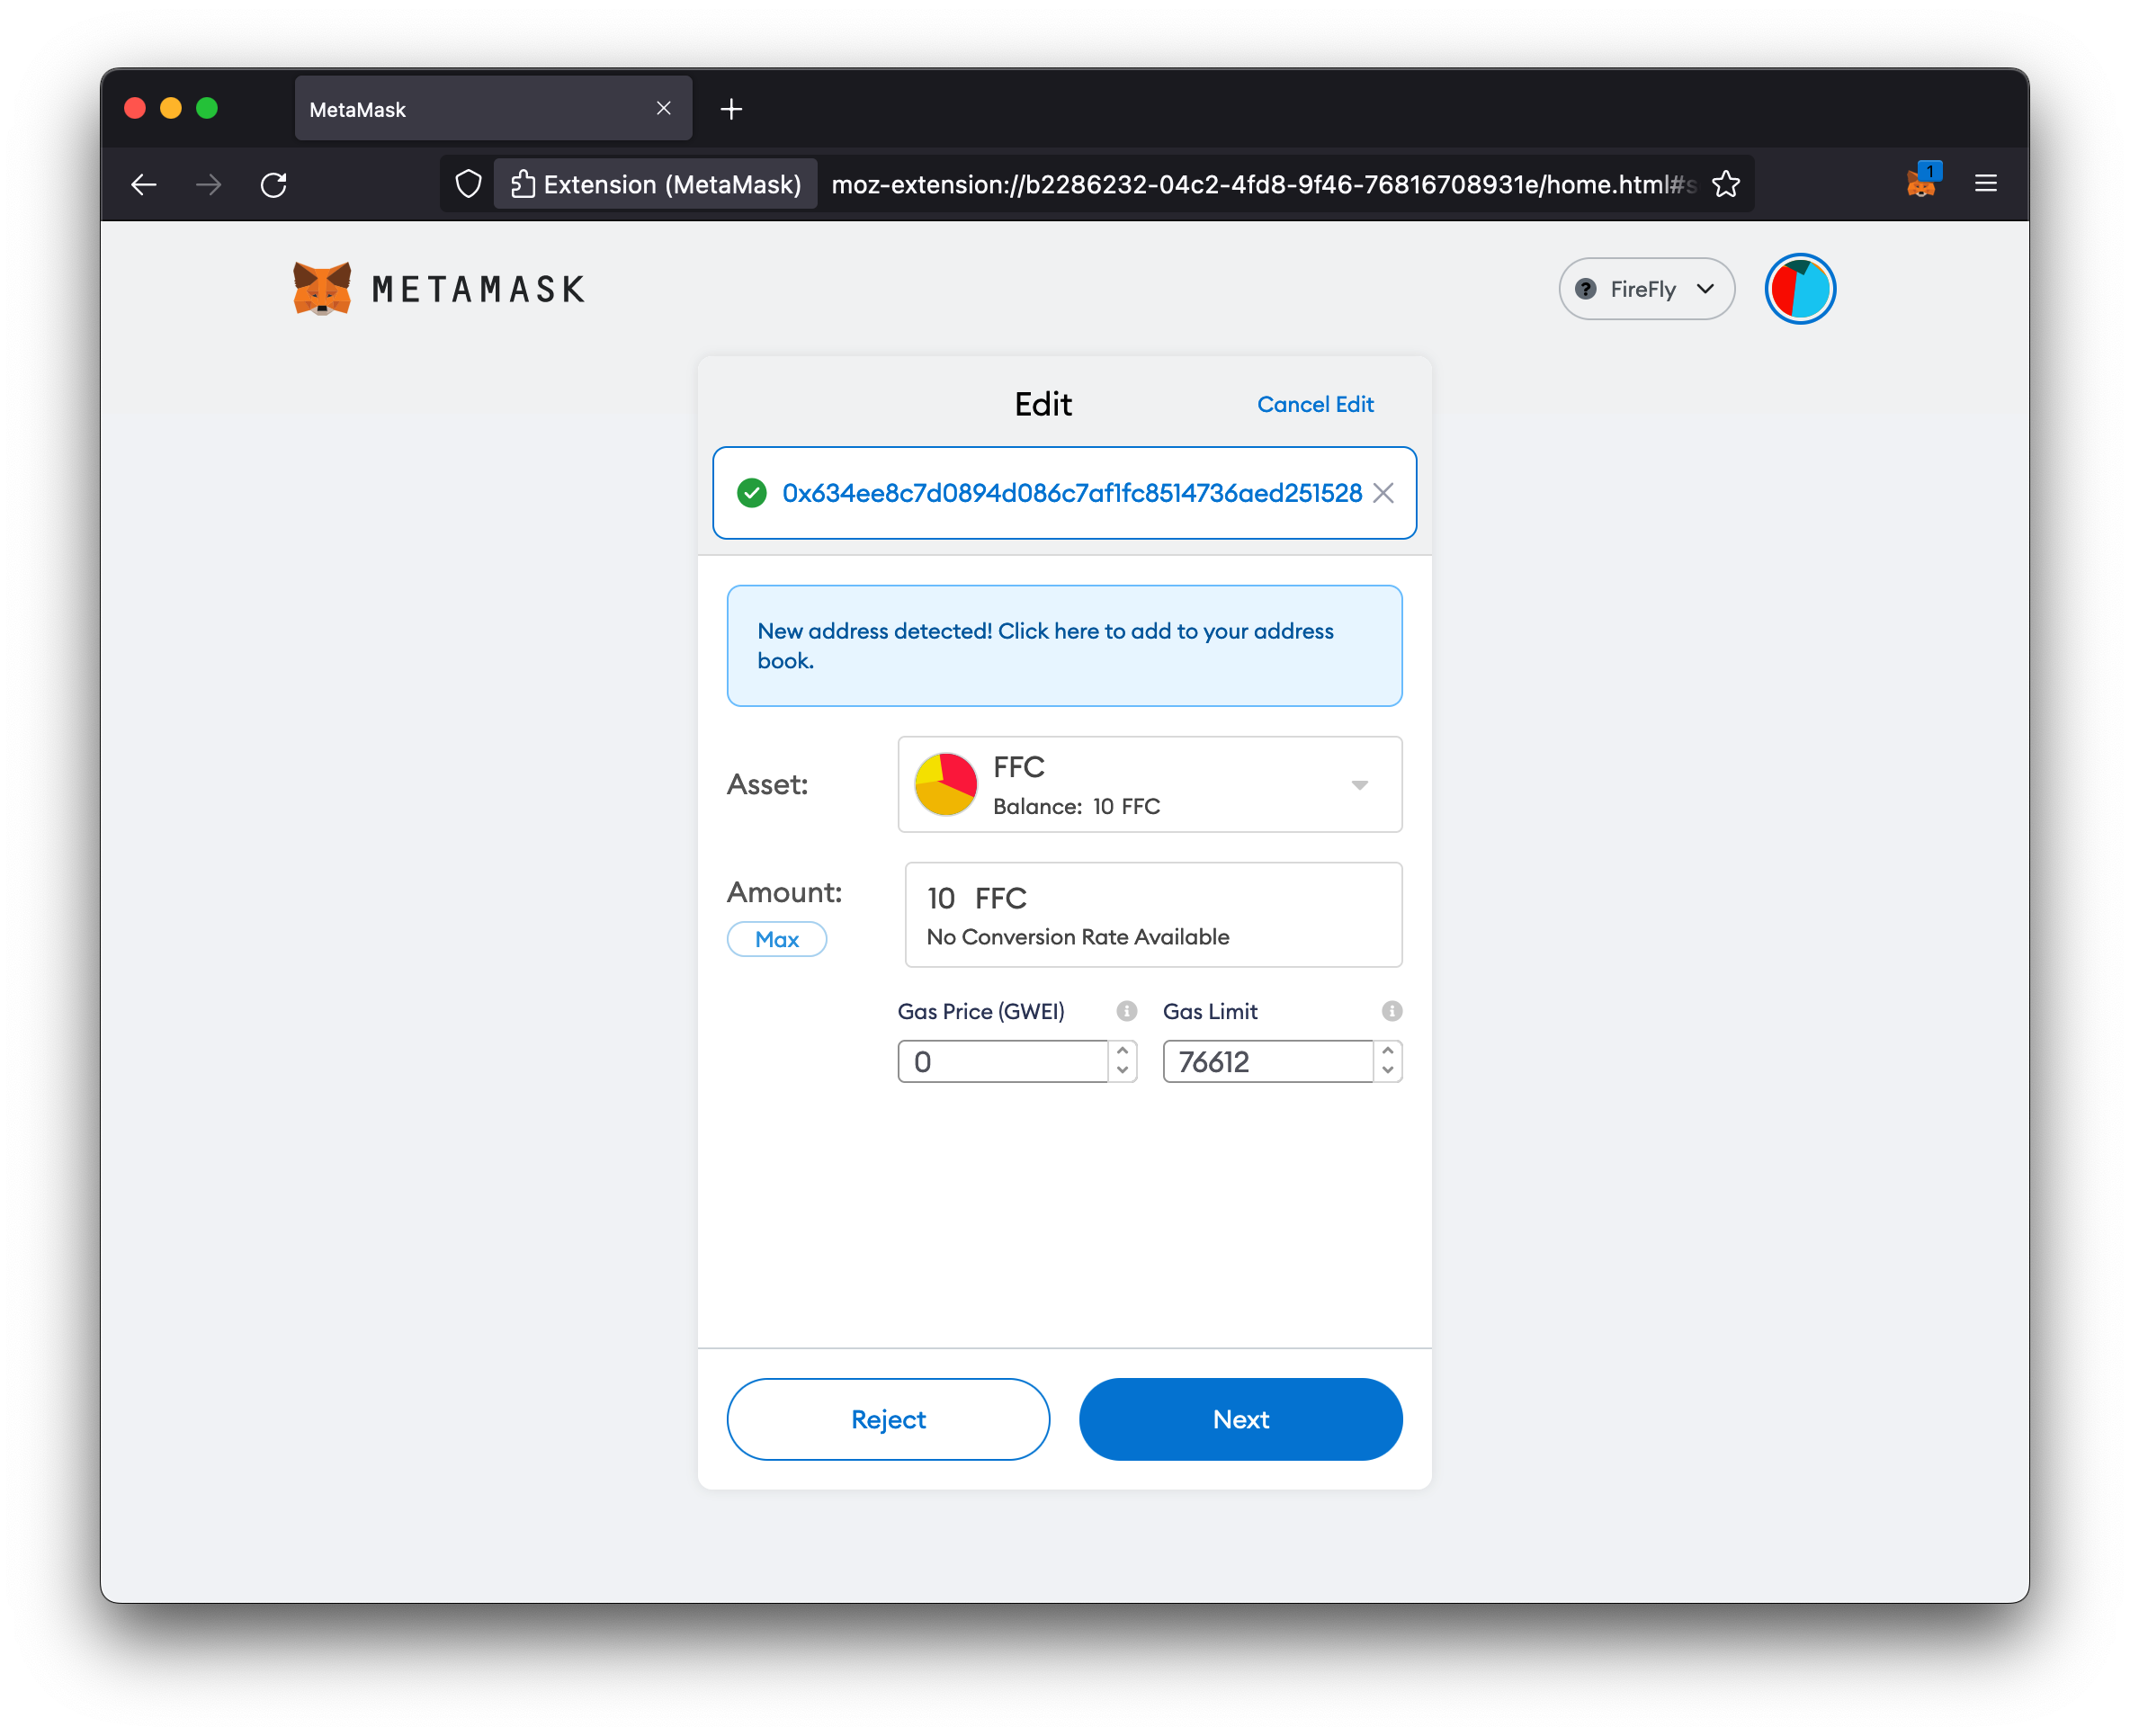
Transfer tokens
Now you can copy your account address from your Metamask wallet, and perform a transfer from FireFly’s API (as described above) to your Metamask address.
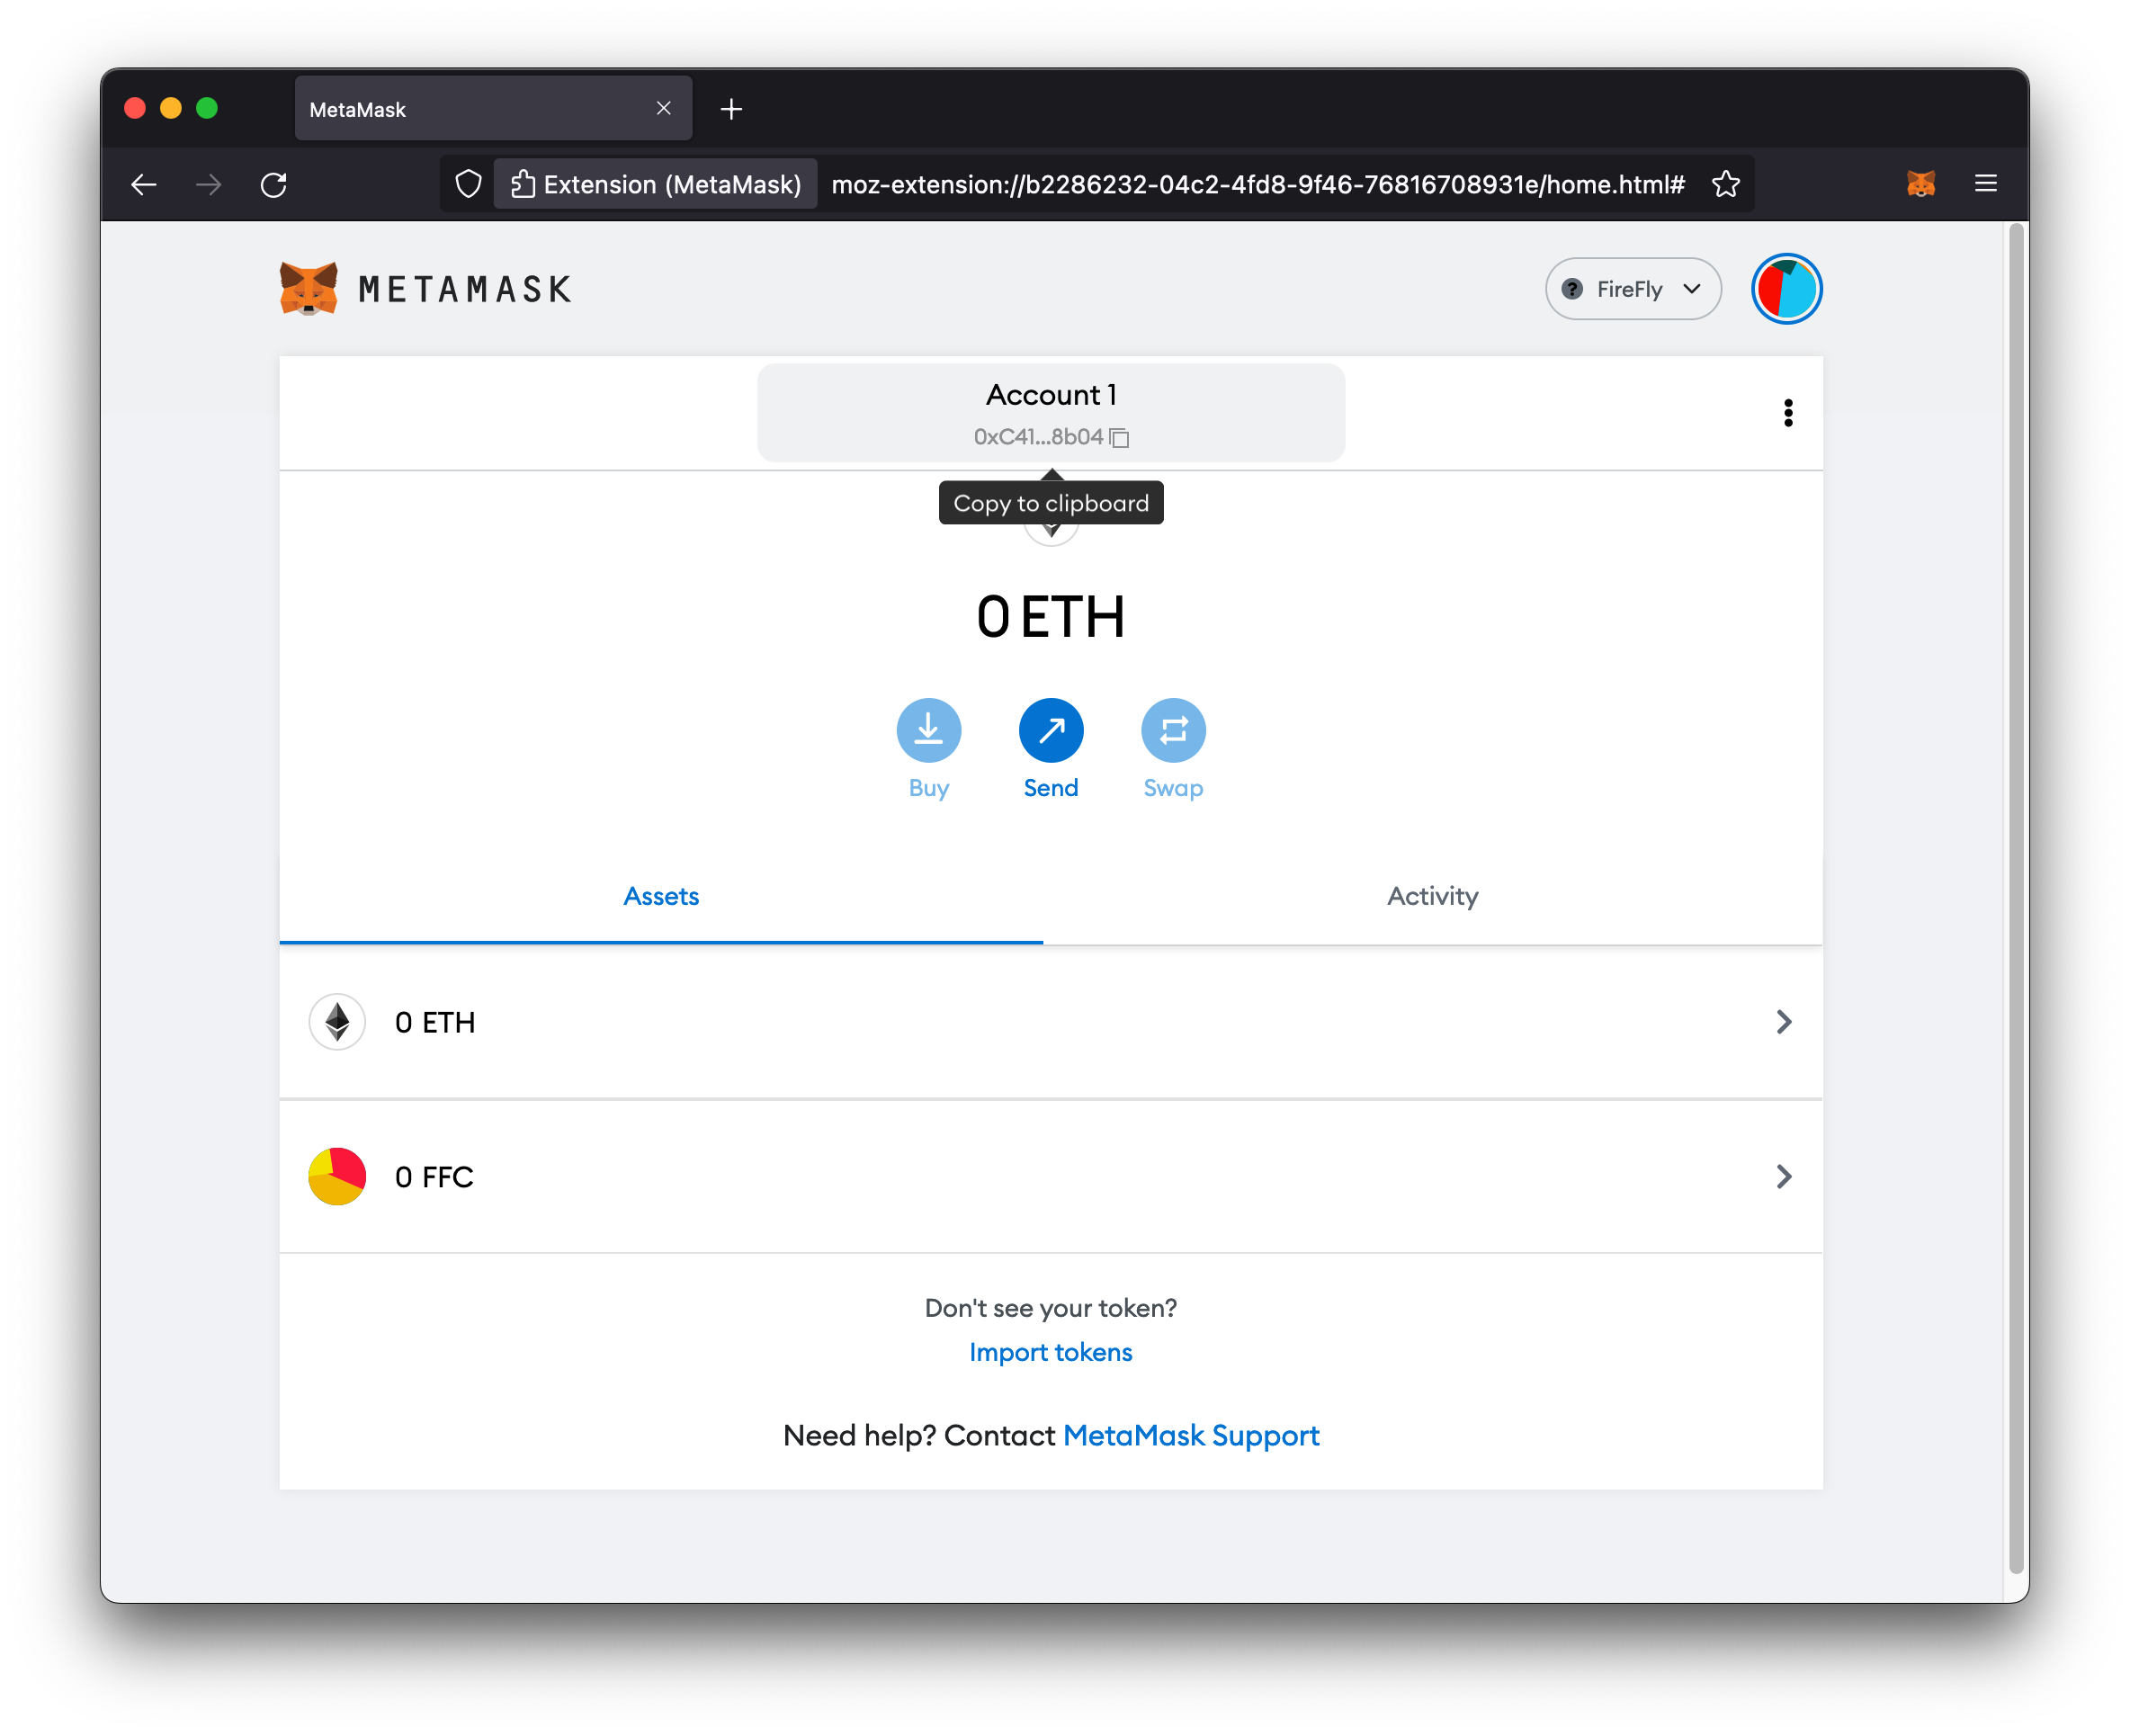
After a couple seconds, you should see your tokens show up in your Metamask wallet.
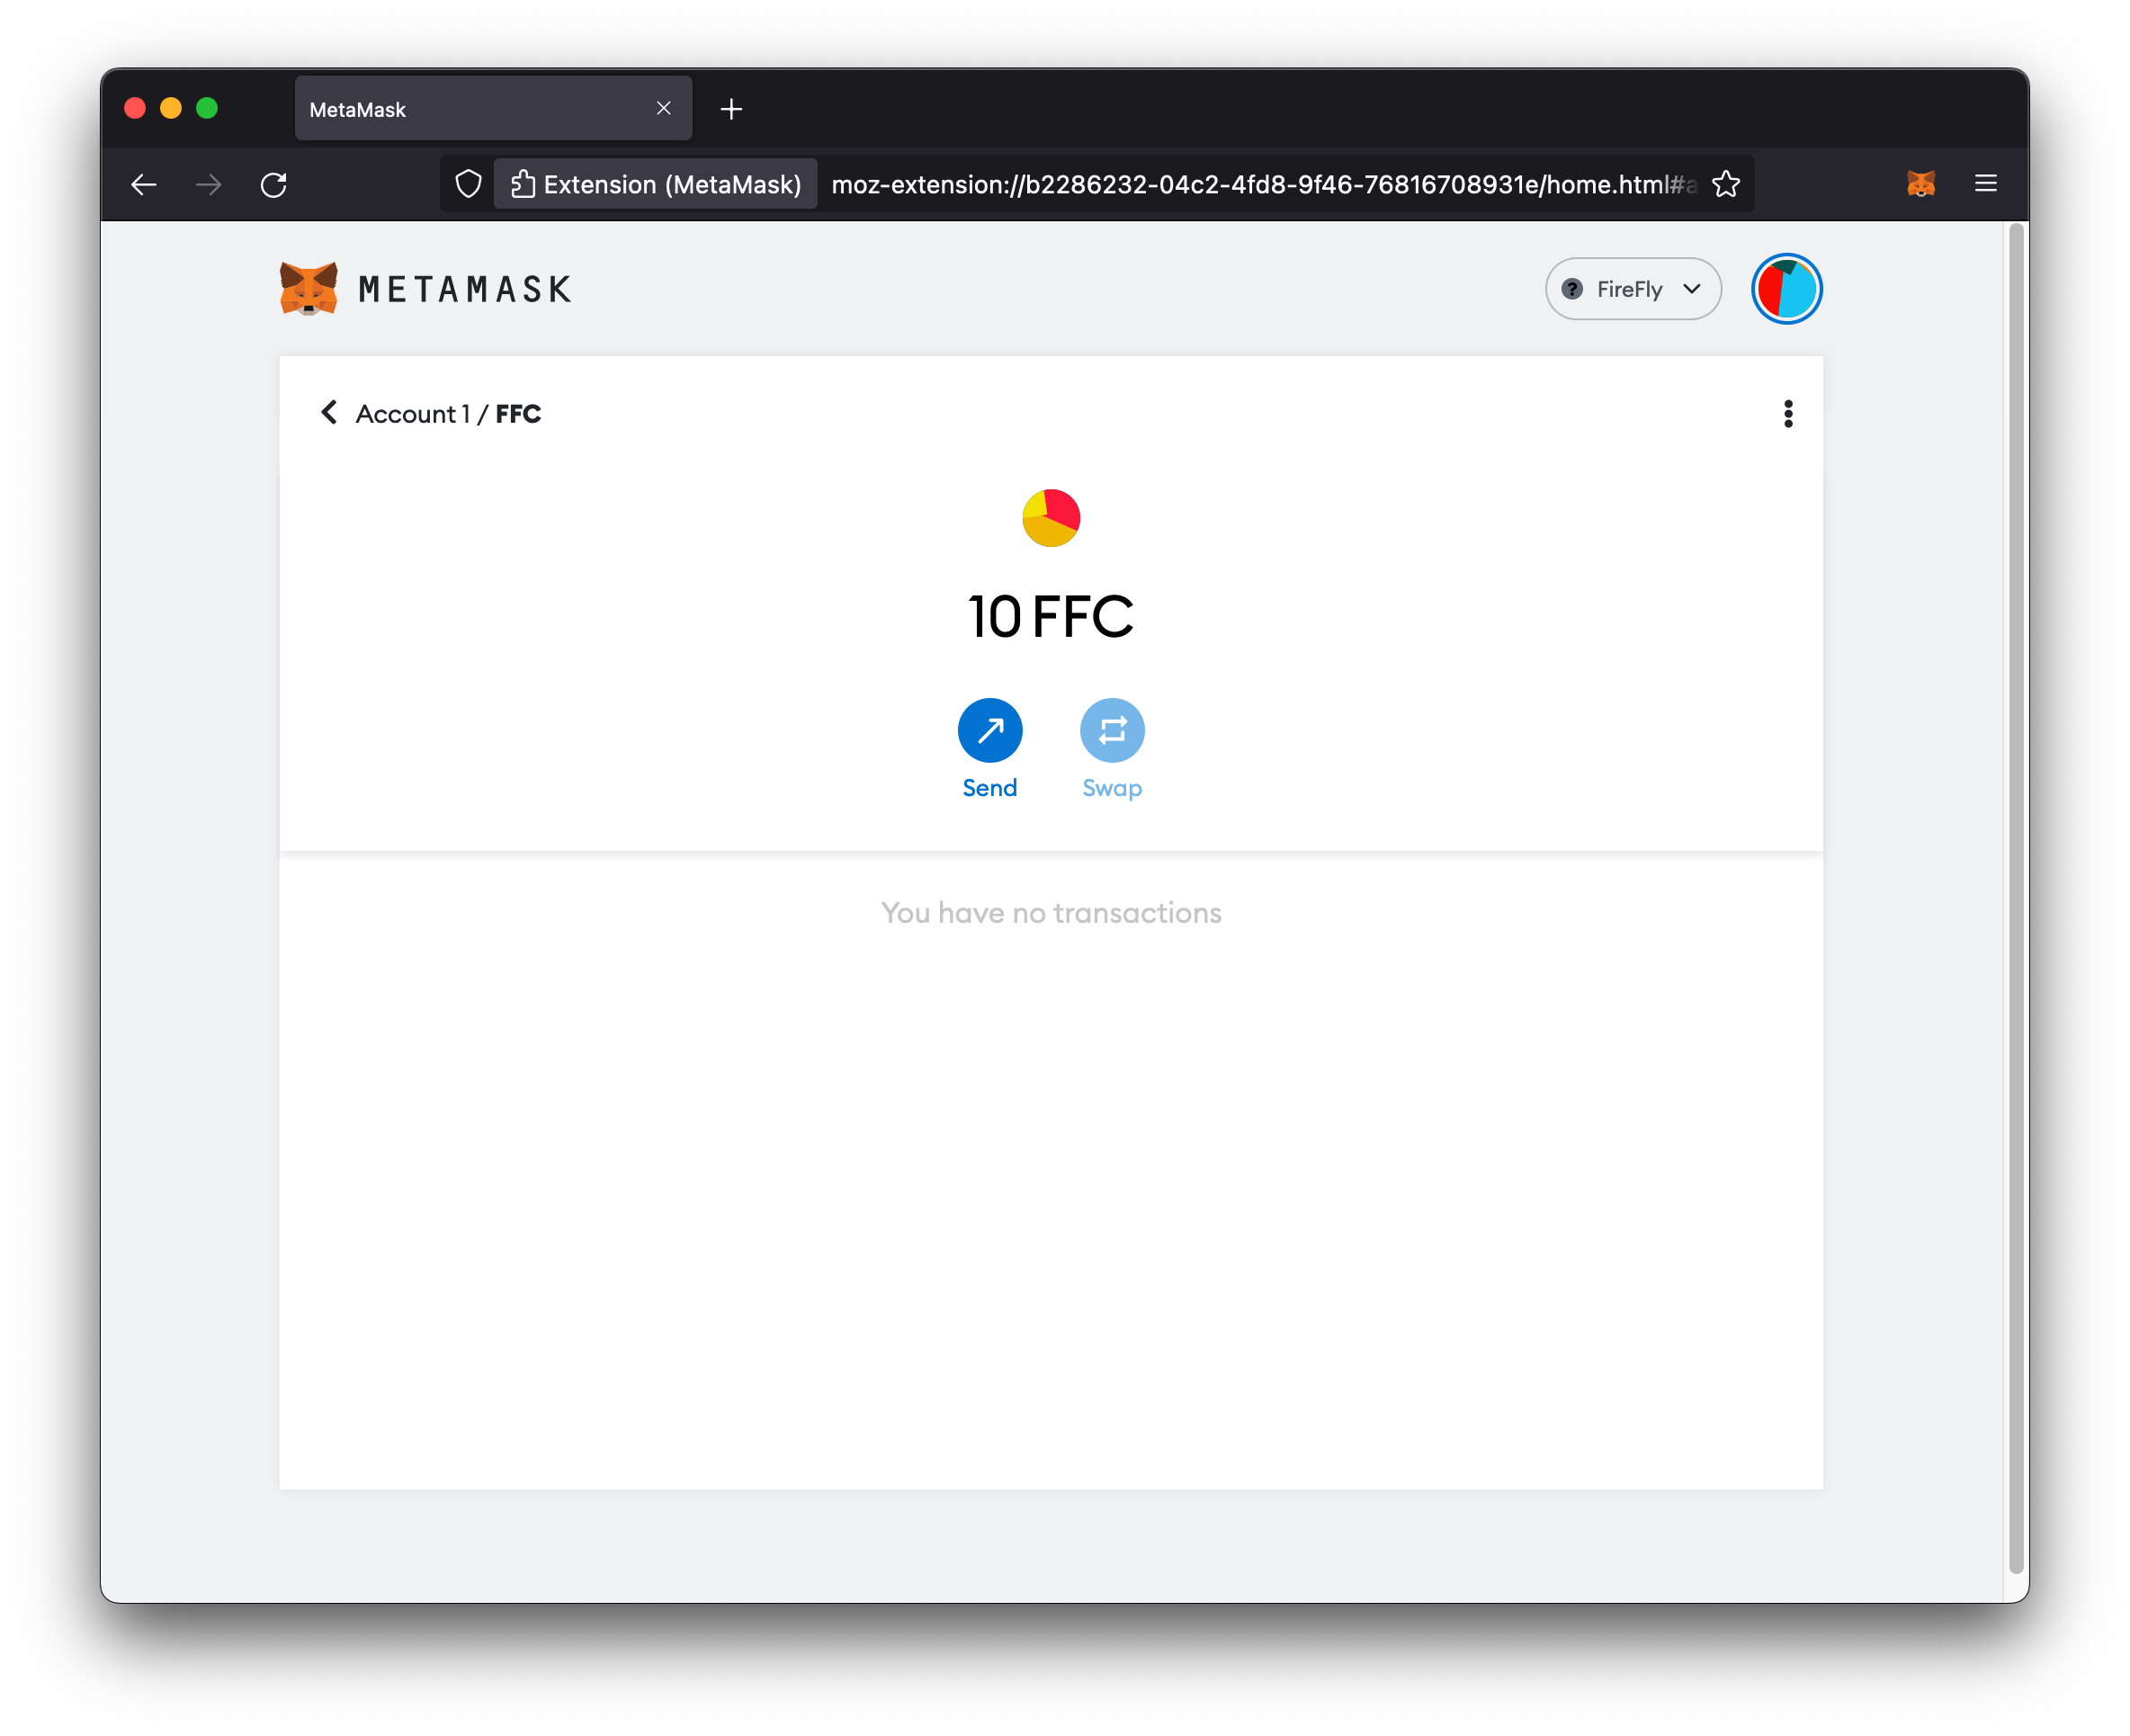
You can also send tokens to a FireFly address or any other Ethereum address from your Metamask wallet.
NOTE: You can find the Ethereum addresses for organizations in your FireFly network in the Network → Organizations page in the FireFly explorer. Click on an organization and look under the Verifiers header for the organization’s Ethereum address.